
Textile Material Compatibility
Fabric and Textile Laser Marking
Textiles do not have one universal laser setting. Fibre chemistry, blend ratio, GSM, weave or knit, dye and coating decide whether the beam creates controlled colour change, melting, foaming or an unwanted scorch. CO₂ marking is a practical first direction for many fabrics, but the production material must be tested.
Practical starting point: treat fibre type, blend ratio, GSM, construction, finish and target result as one test condition. A setting accepted on one fabric should not be assumed to transfer unchanged to another batch or construction.
Request a Quote Contact UsQuick Answer
Can Fabrics and Textiles Be Laser Marked?
Yes. Many natural, synthetic, blended and finished textiles can be laser marked, but there is no universal fabric setting. Fibre chemistry, blend ratio, GSM, weave or knit, dye, coating and tension determine whether the result is a clean colour change, controlled surface modification, melting, shrinkage or scorch.
The practical question is not only whether the fibre can be marked, but whether the required contrast, hand feel, dimensional stability and durability can be achieved without unacceptable heat damage. That should be confirmed on the production fabric rather than inferred from the fibre name alone.
Before testing: identify the fibre or blend, GSM or thickness, construction, colour, finish/coating, target mark and any wash, abrasion or appearance requirement. Unknown coatings or laminates should be identified before laser evaluation.
Fabric Groups
How Common Textile Groups Respond
Use the group only as a starting hypothesis. Fibre blend, GSM, weave or knit, dye and finish can move a fabric into a different process window.
Use these groups as screening guidance, not fixed recipes. The production fabric can behave differently because of blend ratio, colour, finish, weave or knit, GSM and batch.
Natural fibres
Cotton, denim, linen and viscose can darken through controlled carbonisation. Actual contrast depends on colour, construction, finish and the process window; excessive energy can create a brown halo, brittle edge or burn-through.
Check carbonisation on a sampleSynthetic fibres
Polyester, nylon and polypropylene tend to melt, shrink or foam rather than carbonise. The usable window is narrow and the mark may be a light shade change.
Review melt-control variablesBlends and dyed fabrics
A cotton/polyester blend can carbonise and melt in the same pass. Dye, pigment and optical brightener also change contrast and apparent scorching.
Compare mark effectsCoated and laminated fabrics
Known compatible coatings, prints and laminated stacks may respond before the base textile. Identify the coating and adhesive chemistry first; PVC, halogen-containing or unknown coatings should not be treated as a routine laser-processing route.
Plan fume and coating checksMesh, knit and sheer fabrics
Open construction and low GSM reduce heat capacity. Fine detail is possible, but shrinkage, hole formation and tension drift are common failure modes.
Validate construction and tensionApplications
Where Is Laser Marking Used on Textiles, and Why?
The same textile can be used in very different products. The material test should still answer the same question: can the required mark be created without unacceptable scorch, melt, shrinkage, stiffness or loss of durability?
Apparel and garment panels
Logos, decorative graphics, labels, identification marks and selected production references may be added to cut panels or finished garments. Seams, folds and stretch can change focus and distortion risk.
Footwear, bags and upholstery
Textile uppers, linings, patches and interior fabrics may need branding, identification or cosmetic surface effects. Multi-layer construction and nearby hardware often matter as much as the fibre name.
Technical and industrial textiles
Production identification, alignment references, traceability information or controlled surface effects may be useful where ink, labels or consumables are undesirable. Final suitability depends on the textile finish and end-use requirements.
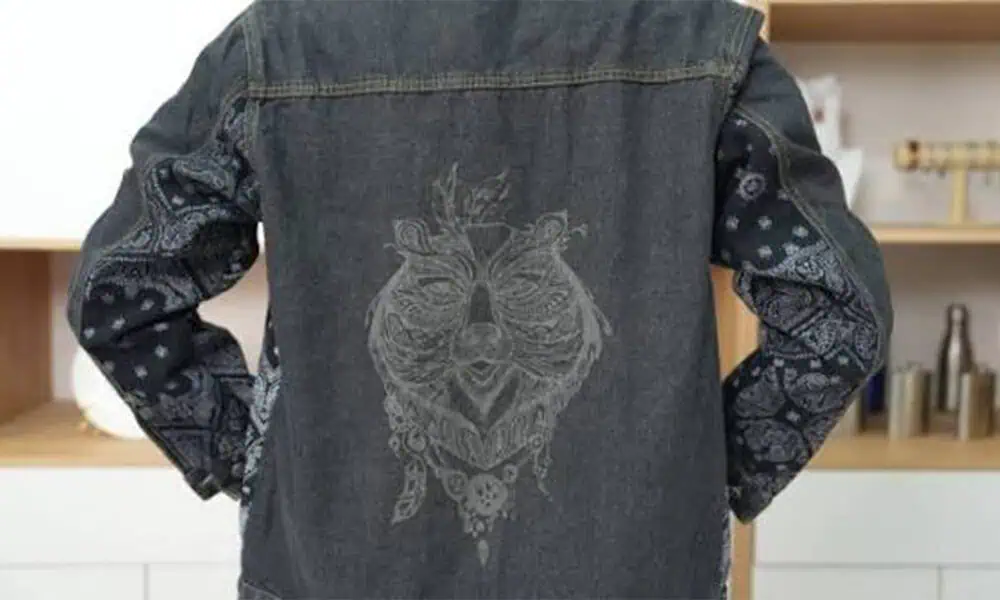
For conveyor handling, roll-to-roll registration, garment positioning, production throughput or automation, review the Textile & Leather application workflow after the material response is confirmed.
Marking Content
What Is Usually Marked on Textiles?
Define the information and smallest feature before comparing laser settings. A large decorative logo and a small machine-readable code do not create the same process requirement.
Branding and graphics
Logos, decorative graphics, patterns and visual identity marks where colour, edge quality and hand feel are the main acceptance criteria.
Text and identification
Names, model information, size or part identification, warnings or other readable text that must remain clear on the actual weave or knit.
Batch and traceability marks
Lot, batch or internal production identifiers where the mark must remain distinguishable after handling or downstream processing.
Production references
Alignment, assembly or positioning marks used during manufacturing when contrast and placement matter more than decorative appearance.
Selected machine-readable codes
QR or Data Matrix can be evaluated when feature size, contrast, stretch and surface texture allow reliable inspection. Code readability must be verified on the actual textile.
Surface-effect details
Controlled tone change or selective treatment of a known compatible surface layer where the required appearance is defined before testing.
Target Result
What Marking Result Do You Need?
Start with the appearance and functional result you need, then test the process mechanism that can create it. “Can the laser mark this fabric?” is less useful than “can it create this contrast, detail and durability without unacceptable damage?”
| Target result | Typical route to the effect | Main failure risk | What to verify |
|---|---|---|---|
| Dark, high-contrast mark | Controlled carbonisation or colour change on a compatible textile. | Scorch halo, brittle fibres, excessive char or smoke. | Contrast, edge quality, residue, hand feel and wash/abrasion response where relevant. |
| Light or tone-change mark | Low-energy surface response on selected dyed or synthetic fabrics. | Weak contrast, uneven tone, dye migration or batch variation. | Colour uniformity, readability and repeatability across representative samples. |
| Minimal change in hand feel | A narrow process window that limits melting, stiffening and fibre damage. | Glossy melt, stiffness, shrinkage or hidden weakening. | Touch, flex, dimensional stability and the appearance under normal use. |
| Fine logo, text or code detail | Controlled focus and heat input matched to the weave, knit and feature size. | Blurred edges, feature loss, melt, burn-through or poor code readability. | Smallest feature, contrast, inspection result and repeatability. |
| Selective treatment of a known compatible coating | Controlled removal or colour change of a documented non-halogenated surface layer. | Uneven removal, odour, adhesion loss or damage to the textile support. | Layer consistency, substrate condition, adhesion and cosmetic limit. |
PVC, halogen-containing or unknown coatings: do not treat them as a routine laser-marking or coating-removal route. Confirm the material composition and review the applicable SDS before any laser-process evaluation.
Part Form and Size
How Fabric Form, GSM, Thickness and Size Change the Setup
The same fibre can need a different process window when it is thin, stretched, multi-layered, sewn into a finished product or handled as a large sheet or roll.
Flat fabric panels
Flat, supported panels are the easiest condition for stable focus and repeatable positioning. Keep the test tension close to the production condition.
Stretch fabrics and knits
Stretch state changes feature size, line width and local heat flow. A logo accepted under one tension can distort or shrink when the fabric is relaxed.
Finished garments and seams
Folds, seams, zippers, buttons and local thickness changes can move the surface away from focus or prevent the fabric from lying flat.
Thin or low-GSM textiles
Lower heat capacity raises the risk of burn-through, holes, shrinkage and distortion. Small test patches and fine parameter steps are important.
Thick, high-GSM or multi-layer textiles
More material can require a different heat balance, while the upper layer must be processed without unintentionally damaging a lower layer.
Large panels and roll goods
If the mark area exceeds the practical field or the textile moves continuously, field size, repositioning, tension control, conveyor/web handling and registration become part of the machine decision.
Laser Route
Which Laser Route Should You Test First?
For many conventional textiles, CO₂ is the practical first source family to evaluate because it can couple effectively with common natural and synthetic fibre systems. It is a starting direction, not a guarantee: the production fabric, finish and target result still define the acceptable window.
UV can be worth a controlled comparison when a documented surface layer or heat-sensitive detail needs lower thermal impact. Fiber or MOPA should not be treated as a default parallel route for ordinary fabrics; consider them only when the specific surface chemistry or technical-textile construction gives a clear reason to test them.
View CO₂ marking machines Request a sample review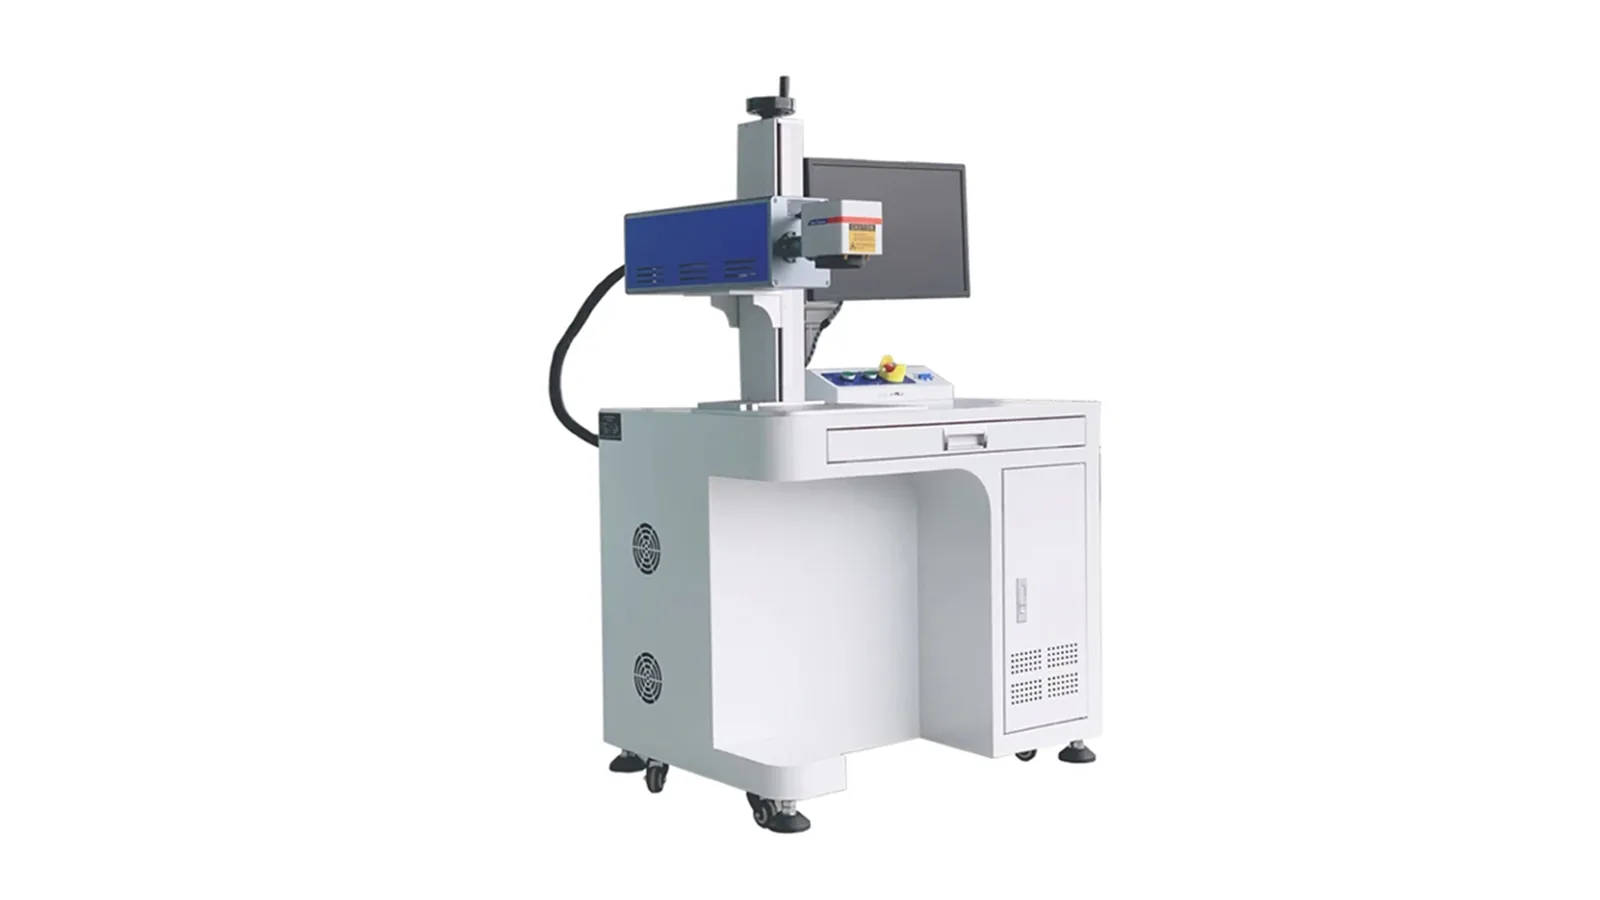
| Textile condition | Possible first direction | Main risk | Must verify |
|---|---|---|---|
| Natural fibre, medium/high GSM | CO₂ screening with controlled heat and extraction. | Scorch spread, brittle edge, smoke and char. | Contrast, edge, residue, hand feel, durability and repeatability. |
| Synthetic or elastane blend | Low-energy CO₂ test with fine parameter steps. | Melting, holes, shrinkage or stiff hand feel. | Shade change, hand feel, dimensional stability and detail. |
| Mesh, knit, sheer or low GSM | CO₂ screening with stable tension and small test patches. | Burn-through, hole formation, distortion and focus drift. | Feature size, tension repeatability and shrinkage. |
| Known non-halogenated coating, laminate or print | Test the documented surface stack; CO₂ may be the first comparison, with UV considered for selected heat-sensitive surface effects. | Uneven removal, odour, adhesion loss or substrate damage. | Layer consistency, fumes, adhesion and cosmetic limit. |
| PVC, halogen-containing or unknown coating | Hold routine laser testing until composition and SDS are reviewed. | Unsafe or corrosive decomposition products and uncertain material response. | Material identity, restricted substances and an approved process-safety route. |
Risks and Failure Modes
What Commonly Goes Wrong When Marking Textiles?
A useful textile trial should identify both the visual failure limit and the process-safety limit. The best setting is not simply the one that creates the darkest mark; it is the one that meets appearance, durability and handling requirements without unacceptable damage or emissions risk.
Mark-quality failures
- Yellow or brown scorch halo around the mark.
- Glossy melt, foaming or a stiff hand feel on synthetics.
- Burn-through, pinholes or local fibre loss on low-GSM fabrics.
- Shrinkage, puckering or dimensional distortion.
- Uneven tone, dye migration or weak contrast across the mark.
- Batch-to-batch variation caused by colour, finish or construction changes.
Durability and usability failures
- Mark fades, cracks or changes after washing, abrasion or flexing.
- Coating or laminate loses adhesion after surface treatment.
- Small text or codes become unreadable because of weave, stretch or low contrast.
- The accepted coupon result does not repeat on a full garment, different tension state or another batch.
Process and safety risks
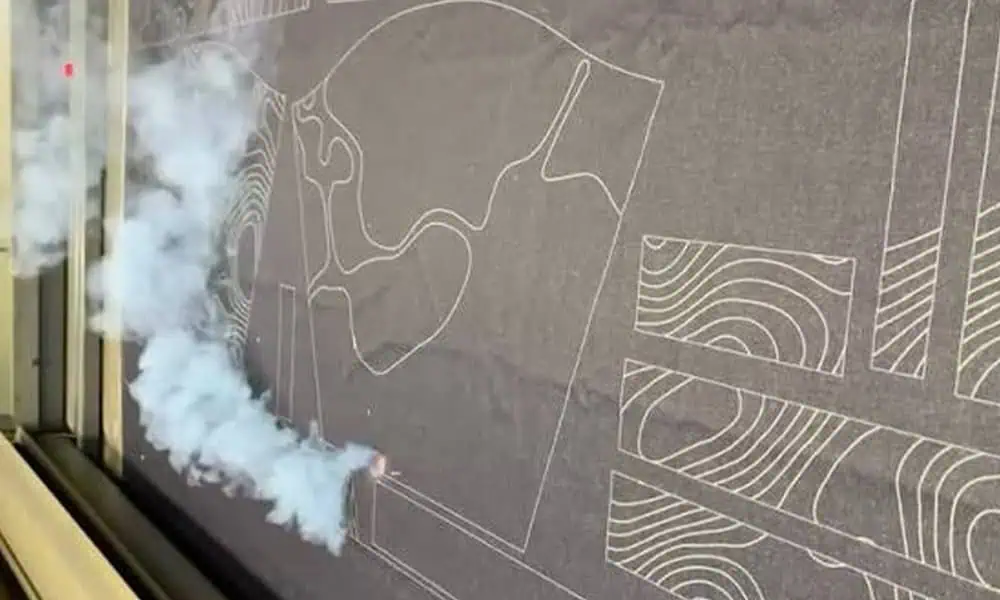
- Smoke, odour, condensate, lint and char require suitable extraction and residue control.
- Unknown adhesives, coatings, flame-retardant treatments and mixed laminates should be identified before testing.
- PVC or other halogen-containing materials should not be treated as routine laser-processing candidates.
- Combustible textile residue, enclosure, airflow and unattended-operation limits belong in the complete machine risk review.
When a failure appears: change one variable at a time and record the result. Power, speed, focus, pass count, pulse/frequency where adjustable, tension and extraction can interact, so large simultaneous changes make the usable window harder to identify.
Sample Validation
How Do You Confirm the Result on a Real Textile?
A useful textile test starts with the production fabric and a defined target result. Sending only “cotton,” “polyester” or “fabric” is not enough to establish a repeatable process window.
Recommended validation sequence: representative material → small parameter matrix → select the acceptable window → inspect appearance and damage → run wash/abrasion/flex checks when relevant → repeat on another production-representative sample or batch.
| Input | What to provide | Why it matters |
|---|---|---|
| Fabric identity | Fibre type, blend ratio, supplier, construction, colour and batch. | Prevents a family name from hiding a different melt or carbonisation response. |
| Surface stack | Dye, pigment, softener, waterproofing, print, coating, adhesive or laminate; identify PVC/halogen status where relevant. | Defines which layer may respond first and whether the material should enter a laser test at all. |
| Weight / construction | GSM, thickness, weave/knit, mesh opening, stretch, tension state and whether the part is single- or multi-layer. | Sets heat spread, burn-through, shrinkage, focus and support requirements. |
| Target result | Contrast/colour, mark size, line width, artwork, code size, hand-feel limit and cosmetic criteria. | Maps the textile to a practical process window and inspection method. |
| Durability | Wash, abrasion, flex, solvent, outdoor or downstream-finishing exposure. | A readable mark can still fail its real end-use requirement. |
| Production and safety | Part dimensions, piece/web handling, cycle target, extraction constraints, SDS and restricted substances. | Connects the sample result to a safe and repeatable machine configuration. |
Use production-representative samples. A single coupon represents one material, finish, batch, tension state and parameter set. Confirm the chosen window on the conditions that matter in production before locking the machine configuration.
What should a useful textile test report show?
- Fibre/blend, GSM, construction, colour, finish and batch identity.
- Machine/source route and the accepted process-window record.
- Close-up result plus any rejected or boundary condition that defines the failure limit.
- Checks for contrast, edge quality, scorch/melt, hand feel, shrinkage, readability and applicable wash/abrasion performance.
Final Machine Configuration
From an Approved Sample to the Final Machine Configuration
Once the textile and mark result are approved, the machine should be configured around the accepted process window, mark size, part form, production handling and safety requirements. Higher power alone does not define the right machine.
| Confirmed input | Configuration decision | Why it matters |
|---|---|---|
| Approved laser route and process window | Source family, suitable power class and controllable parameter range. | The machine must reproduce the accepted result without forcing the process to run near a failure limit. |
| Mark size and smallest feature | Lens, marking field, focus strategy and resolution requirement. | A larger field can reduce detail; field size should follow the actual artwork and inspection requirement. |
| Flat panel, finished garment or uneven surface | Support, fixture, working height and focus-handling method. | Seams, folds and local thickness changes can move the textile out of focus or shift the mark position. |
| Stretch fabric or repeatable tension requirement | Tensioning fixture, support method or controlled web handling. | Repeatable tension helps control distortion, feature size and positioning. |
| Large panel or roll material | Marking-field strategy, repositioning, conveyor/web handling, motion and registration review. | The material may be larger than one practical marking field or may need continuous handling. |
| Position-sensitive logo, text or code | Fixture, alignment method or vision review where justified. | Position accuracy should be solved by the handling and locating method, not by laser power. |
| Cycle and loading target | Manual, semi-automatic or integrated handling review. | Scan speed is only one part of full cycle time; loading, positioning and unloading also matter. |
| Smoke, odour and residue condition | Extraction, filtration, enclosure and cleaning plan. | The final machine must manage the actual process by-products and operating environment. |
For an RFQ: send the production fabric or a representative sample, fibre/blend, GSM or thickness, finish/coating information, part dimensions, artwork, mark area, target result, cycle expectation, handling method, durability requirement and SDS/restricted-substance information where relevant.
Frequently Asked Questions
Fabric and Textile Laser Marking FAQs
Is a CO₂ laser suitable for fabric and textiles?
CO₂ is commonly the first source family to evaluate for many fabrics, but suitability depends on fibre, blend, GSM, construction, finish, target effect and smoke-control setup. Test the production fabric before selecting a configuration.
Can one CO₂ setting mark every textile?
No. Cotton, polyester, nylon, blends and coated fabrics absorb and deform differently. Keep an accepted parameter record for each fabric variant and batch.
Why do fabric edges melt, scorch or turn yellow?
Heat has spread beyond the intended mark or the energy is too high for the fabric weight and surface. Power, speed, focus, pulse, tension and repetition interact, so correct one variable at a time on a representative sample.
Do synthetic textiles need fume extraction?
Yes. Plan extraction for smoke, odour and residue on synthetic or coated textiles. For unknown coatings, adhesives or laminates, confirm the material information and SDS before testing; PVC or other halogen-containing materials should not be treated as routine laser-processing candidates.
Can fabric be marked without changing hand feel?
Sometimes, but the acceptable window can be narrow. GSM, construction, blend and target appearance determine whether the result is a clean colour change, melt, burn-off or unacceptable stiffness. Sample validation is essential.
Is textile marking the same as laser cutting or perforation?
No. Marking aims to create a controlled surface or colour effect without intentionally cutting through the textile. Cutting and perforation require a separate process and equipment review.
Prepare a Useful Textile Test
Send the Actual Fabric and Target Effect
Provide a production-representative fabric sample, fibre/blend, GSM or thickness, finish/coating information, part dimensions, artwork or code, target result, wash/abrasion requirement, cycle expectation, handling method and SDS or extraction constraints where relevant.