
Laser Marking Machine Applications – Textile, Leather & Footwear
Textile Leather & Footwear Laser Marking Applications
Textile, leather and footwear manufacturers use laser marking for logos, decorative patterns, size and care information, batch or traceability codes, and selected variable-data tasks. The correct process depends on the exact material or coating, target appearance, part geometry, loading method, production rate and fume-control requirement. Sample testing should confirm both the mark quality and the production configuration before a machine is selected.
- Leather goods, footwear, textile labels and fabric patterns
- Define contrast, edge quality, durability and code readability before testing
- Compare CO2 and UV only where the material and target result justify it
- Use sample results to set fixture, positioning, extraction and production form
Industry & Product Scope
Which Textile, Leather and Footwear Products Use Laser Marking?
Start with the real product and marked area before choosing a machine. Leather goods, footwear, textile labels and fabric-pattern applications create different requirements for appearance, geometry, positioning, handling and production speed; use the closest application below when the project needs more specific guidance.
Leather Goods Marking
Bags, belts, wallets, cases and leather accessories where logo quality, surface finish, part support, odor and cosmetic inspection matter.
View leather goods markingFootwear Laser Marking
Uppers, soles, insoles, tabs and footwear components with curved geometry, multi-material stacks, heat sensitivity and odor controls.
View footwear markingTextile Label Laser Marking
Fabric labels, synthetic labels and sewn-in or roll-fed tags that need variable data, batch codes, sizing, care symbols or online coding.
View textile label markingFabric Pattern Laser Marking
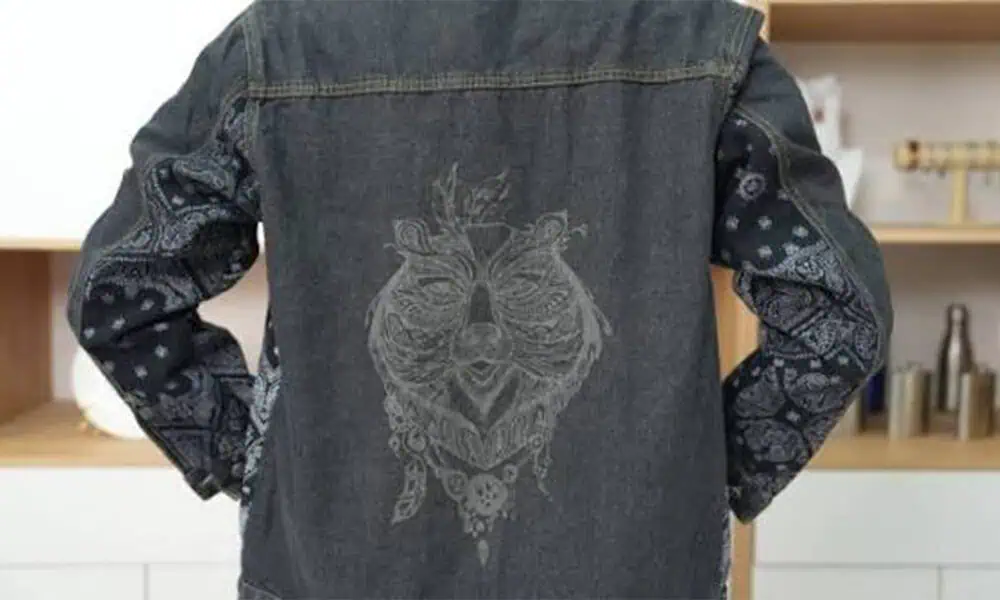
Denim, apparel panels, upholstery and decorative textile surfaces where pattern placement, scorch edge, shrinkage and repeatability drive the setup.
View fabric pattern markingWhy Mark
Why Are Textile, Leather and Footwear Products Laser Marked?
The reason for marking determines what must be visible, durable, readable or repeatable. A decorative logo and a production traceability code can use the same product family but require very different acceptance checks.
Branding and decoration
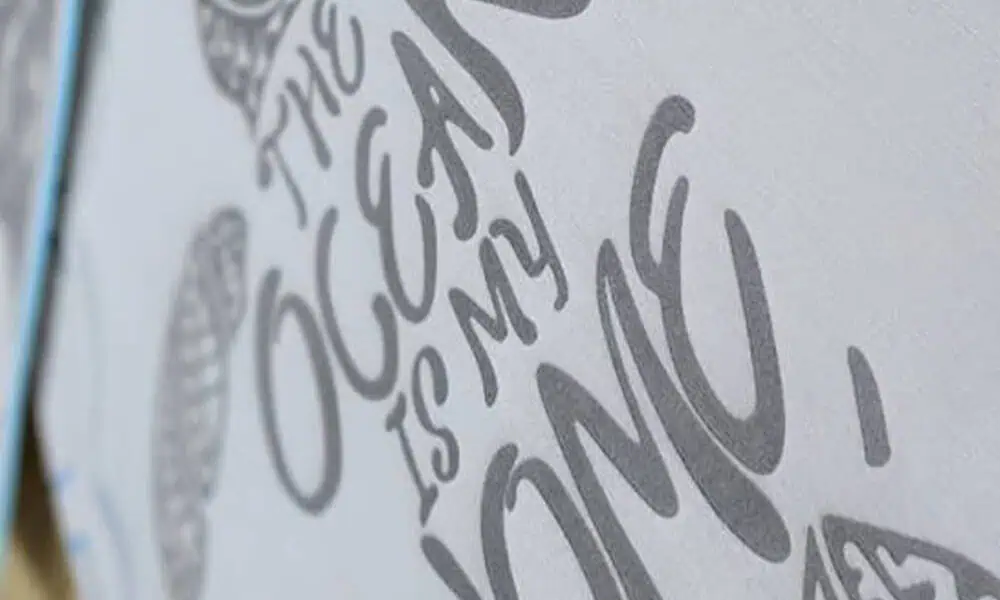
Apply logos, icons, monograms, textures and decorative patterns without adding a separate printed label or mechanical engraving step.
Product information
Mark size, model, care information, part identification or other fixed information directly on a label, component or finished accessory.
Traceability and variable data
Add batch codes, serial numbers, QR codes or Data Matrix codes when production history or item-level identification must follow the product.
Flexible short-run production
Change artwork or data between styles, sizes, batches or personalized orders when digital content changes more frequently than the physical workstation.

Marking Content
What Is Usually Marked on Textile, Leather and Footwear Products?
The marking content changes the required feature size, contrast, positioning method, data workflow and inspection method. Define the actual artwork or code before comparing machine configurations.
| Mark content | Typical products | What to check |
|---|---|---|
| Logo or decorative graphic | Leather bags, belts, wallets, shoe uppers, denim and apparel panels. | Placement, edge quality, tone or contrast, surface feel and cosmetic reject limit. |
| Size, model or care information | Textile labels, shoe components and apparel accessories. | Small-character clarity, contrast and wash/rub durability where the end use requires it. |
| Batch code, date code or serial number | Labels, tags, footwear components and packaged textile accessories. | Character size, data source, changeover method and repeatable placement. |
| QR or Data Matrix code | Traceability labels, anti-counterfeit tags and manufacturing IDs. | Module size, contrast, quiet zone, scanner lighting and rework rule. |
| Large pattern or texture | Denim effects, fabric panels, upholstery and branded textile surfaces. | Pattern alignment, heat effect, shrinkage, web or panel tension and repeatability across the full area. |
When a code must exchange data with a production database, scanner, PLC or MES, review the required data flow together with the marking task. See Traceability, PLC, MES & Data Integration for system-level integration methods.
Result Variables
What Determines the Laser Marking Result?
Material name alone is not enough. The process window is shaped by the surface construction, target effect, detail size, geometry, production requirement and fume behavior of the real part.
Material and surface construction
Leather type, textile fiber or blend, synthetic layer, coating, foam, rubber, adhesive and finish can change absorption, color response, melting, scorching and residue.
Mark type and feature requirement
Light or dark contrast, shallow engraving, decorative texture, fine text or a machine-readable code create different feature, surface-effect and process-window requirements.
Detail and marked area
Small characters and code modules emphasize optical resolution and focus stability; larger patterns emphasize field coverage, placement and heat management across the area.
Part geometry
Flat, soft, stitched, curved, molded or roll-fed parts change support, datum recovery, working distance and the amount of height variation that must be controlled.
Production requirement
Batch size, takt time, line speed, operator loading, SKU changeover and variable data determine whether manual, vision-assisted, flying or automated handling is practical.
Smoke, odor and residue
Fume volume, condensate and residue can affect optics cleanliness, part appearance, operator environment and the extraction package required for stable production.
For material-specific response, review the relevant leather, textile, foam and EVA, silicone and rubber or coated plastic guidance before freezing the process window.
Target Result
What Result Should Be Defined Before Testing?
A sample should be judged against the result the production part actually needs. Define acceptance criteria before comparing laser sources, because a visually visible mark may still fail durability, code readability, surface quality or cycle-time requirements.
| Task | Target result | Typical acceptance focus |
|---|---|---|
| Logo or decorative mark | Required tone, contrast or texture with controlled cosmetic impact. | Edge definition, uniformity, placement, surface feel and visible heat damage. |
| Textile label information | Readable small text or symbols that remain acceptable through the required handling or exposure. | Character clarity, contrast and any specified wash/rub test. |
| QR or Data Matrix code | Stable code geometry and contrast that can be read under the intended inspection setup. | Module shape, quiet zone, scanner result and repeatability. |
| Fabric pattern | Consistent pattern placement and appearance across the intended panel or web area. | Alignment, tone consistency, shrinkage, scorching and repeatability. |
| Footwear component | Consistent mark on the actual curved or molded part without unacceptable surface damage. | Focus consistency, position, heat effect, residue and cosmetic reject limit. |
Geometry and Loading
How Do Part Shape and Loading Affect the Setup?
Many textile and footwear problems are positioning or support problems rather than laser-source problems. The workpiece must stay at a repeatable position and focus condition while the operator or line loads the part.
- Flat flexible pieces: use a stable support surface, repeatable datum and enough hold-down to prevent wrinkles, sagging or edge lift.
- Curved footwear or molded parts: review support nests, marking angle, height variation, field coverage and access to the cosmetic area.
- Roll-fed labels or fabric: control web tension, trigger position, line speed, variable data timing and extraction across the moving web.
- Small batches and personalization: plan artwork changeover, fixture changeover, operator alignment and first-off approval so frequent SKU changes do not create placement errors.
- Variable part position: improve the fixture first, or evaluate vision positioning when the part cannot be located consistently by mechanical references alone.
First-Test Laser
Which Laser Source Should Be Tested First?
Choose the first laser test from the material construction and target result, not from the product name alone. CO2 is a common first comparison for many leather and textile tasks; UV can be worth comparing for selected heat-sensitive synthetic or coated surfaces and fine-detail requirements.
CO2 laser marking
Review first when: the application uses leather, textile, fabric, organic surfaces or selected non-metal layers where a CO2 interaction is likely to produce the required contrast, engraving or surface effect.
Sample test must check: color or contrast, scorching, edge quality, shrinkage, residue, odor and cycle time on the actual material and finish.
UV laser marking
Compare when: selected synthetic labels, coated polymer surfaces or fine-detail applications do not meet the target with the first process, or heat sensitivity makes another wavelength worth testing.
Sample test must check: whether the required detail and contrast improve without creating unacceptable surface damage, residue or cycle-time tradeoffs.
Metal hardware boundary: if the marked component is actually a metal buckle, zipper pull, eyelet, metal tag or other hardware, treat it as a metal-marking task and screen the appropriate Fiber/MOPA route for that metal and surface instead of assuming the leather/textile source direction applies.
Important: do not choose source power or a final machine from a generic material label. Record the exact sample, surface condition, artwork and acceptance result before moving from source screening to configuration selection.
Positioning and Production Form
When Are Fixtures, Vision or Flying Marking Needed?
Fixture, vision and flying marking solve handling and positioning problems. They should be evaluated after the source test shows that the material and target effect are feasible.
Fixture or support nest
Use a mechanical reference when soft, curved or molded parts need repeatable support, orientation or height during manual loading.
Vision positioning
Evaluate vision when part position or orientation varies enough that a fixed fixture cannot place the artwork reliably relative to the real product.
Flying / online marking
Evaluate online marking for roll-fed labels, continuous webs or moving production where line speed, trigger timing and data changes must stay synchronized.
Failure Modes
Where Do Textile, Leather and Footwear Laser Marking Projects Commonly Fail?
A failed sample should be diagnosed by the visible symptom. Changing source power blindly can hide the real cause when the problem is material variation, focus, support, overlap, positioning or extraction.
| Observed problem | Possible causes | Check first |
|---|---|---|
| Uneven color or contrast | Surface-finish variation, material batch difference, inconsistent focus or uneven support. | Compare parts from the same batch, confirm surface condition and verify working distance across the marked area. |
| Scorching, excessive darkening or charring | Too much thermal input, excessive overlap, slow scanning or a process window that is too aggressive for the surface. | Reduce the thermal load systematically while keeping the sample, artwork and focus condition controlled. |
| Melting, glazing, shrinkage or distortion | Heat-sensitive synthetic layer, excessive energy density or unsupported flexible material. | Confirm the material construction, then compare a lower-heat process window or another source direction where justified. |
| Fuzzy or distorted edges | Wrinkling, sagging, part motion, height change or poor datum recovery. | Stabilize the workpiece and verify focus before changing the laser recipe. |
| Poor QR or Data Matrix readability | Insufficient contrast, deformed modules, surface texture, contamination or inconsistent placement. | Inspect module geometry and contrast on the real surface, then verify with the intended reader or verifier setup. |
| Smoke residue, condensate or persistent odor | High-fume material, poor capture position, inadequate airflow or an unsuitable material/process combination. | Review fume capture at the mark and identify unknown coatings, adhesives or additives before continuing production testing. |
| Inconsistent mark position | Loose fixture, variable web tension, changing part orientation or incorrect trigger timing. | Separate the positioning error from the laser result and correct the datum, fixture, vision or trigger method. |
Smoke, Odor and Residue
Fume Control Must Be Evaluated With the Real Material
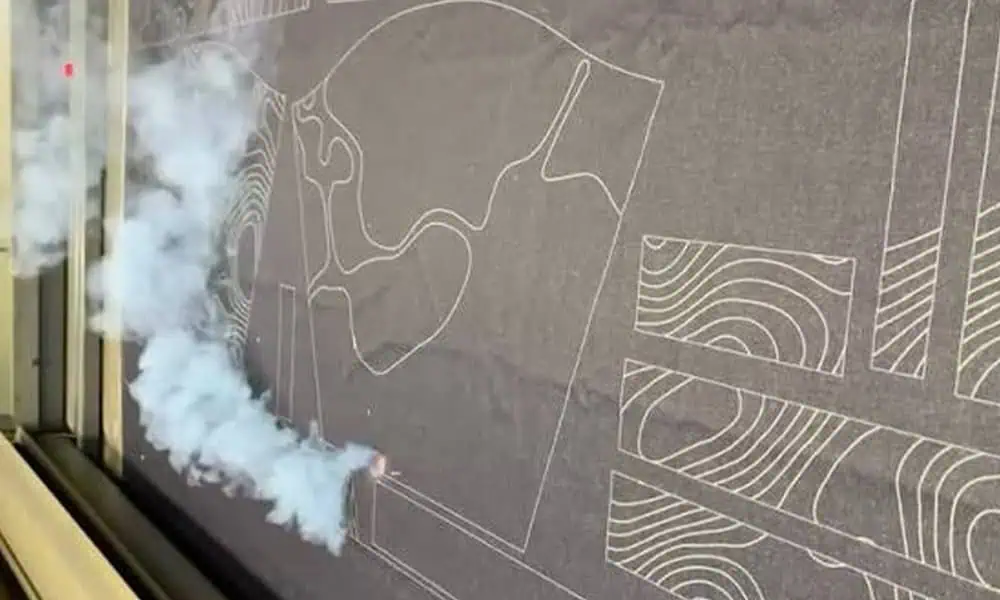
Leather, textile, foam, rubber and coated synthetic products can produce smoke, odor, condensate, char or residue. Extraction affects cleanliness, optics maintenance, operator conditions and whether the qualified sample can be repeated in production.
Identify unknown layers before testing
Unknown synthetic leather, flame-retardant textiles, coated fabrics, adhesives and multi-layer footwear parts may need supplier material information or an SDS before process trials and extraction planning.
Qualify extraction with the process
Record where fumes are captured, whether residue returns to the part, how quickly deposits build up and whether cleaning or filter requirements are practical at the intended production rate.
Before Sample Testing
What Information Should Be Prepared Before Testing?
The test should represent the real product and production requirement. The application brief should define the part, material, artwork, geometry, acceptance criteria and expected production context before samples are compared.
| Input | What to provide | Why it matters |
|---|---|---|
| Product type | Bag, belt, wallet, shoe upper, outsole, insole, fabric panel, label, roll material or accessory. | Defines geometry, handling, cosmetic area and throughput expectations. |
| Material and surface | Leather type, textile fiber/blend, foam, rubber, coating, adhesive or synthetic construction; supplier material information where available. | Sets the source-screening and fume-control assumptions that need to be tested. |
| Artwork or code | Logo file, text, QR/Data Matrix, serial format, size and smallest feature. | Sets detail, field, data and inspection requirements. |
| Part geometry and loading | Flat/curved/soft/stitched area, thickness, marked location, tolerance, datum and loading method. | Determines support, focus, fixture, vision or online handling needs. |
| Acceptance criteria | Target tone or contrast, depth if relevant, edge quality, hand feel, wash/rub/flex exposure, code readability, odor and residue limits. | Defines what counts as a successful sample instead of relying on appearance alone. |
| Production context | Batch size, expected cycle, line speed, SKU changes, operator workflow, data connection and sample quantity. | Connects the sample result to a realistic workstation and quotation scope. |
Sample Qualification
How Should Representative Samples Be Qualified?
Qualification should answer two questions: does the mark meet the product requirement, and can that result be repeated under the intended production conditions?
1. Confirm appearance and detail
Compare tone, contrast, edge definition, smallest features and surface condition against the agreed target.
2. Check unwanted damage
Inspect for scorching, melting, shrinkage, distortion, excessive residue, coating damage or unacceptable texture change.
3. Check durability where required
Use the customer-required wash, rub, flex or handling exposure when durability matters to the real application.
4. Verify codes where applicable
Read or verify QR, Data Matrix or serial content using the intended inspection method and lighting condition.
5. Repeat on representative parts
Test multiple real parts or representative sections to reveal batch, curvature, placement and support variation.
6. Record the production conditions
Record the qualified source direction, process settings, optics/field assumptions, fixture, working distance, extraction condition and actual cycle time used for the accepted sample.
Production Workflow
How Does a Qualified Sample Move Into Production?
Once a representative sample has passed qualification, the next task is to reproduce that accepted result under real loading, positioning, extraction and cycle conditions. Production setup should freeze the conditions that made the sample acceptable and verify that operators or the line can repeat them.
1. Freeze the qualified material and surface
Record the material, coating, finish, supplier or batch information and representative product condition used for the accepted sample.
2. Freeze the qualified process condition
Record the accepted source direction, process window, artwork, optics/field assumptions and other conditions that directly affect the mark.
3. Freeze support, datum and focus
Define the fixture, hold-down, datum, working distance and marked position needed to reproduce the qualified sample on the real part.
4. Verify real loading and changeover
Run the intended operator, tray, web or line-loading method and check accessibility, placement recovery, SKU changeover and first-off setup.
5. Verify repeatability, cycle and extraction
Run multiple representative parts under the intended production rhythm and confirm actual cycle time, mark consistency, fume capture and residue behavior.
6. Define first-off, routine inspection and reject rules
Set the first-off approval, routine inspection method, code verification where required and the conditions that trigger rework, parameter review or process escalation.
Test Result to Machine Configuration
How Do Sample Results Determine the Final Machine Configuration?
The accepted sample narrows the laser source, but the final machine is determined by both the mark result and the production constraints. Use the test findings to map source, optics, field, fixture, positioning, extraction and automation requirements.
| Test or production finding | Configuration consequence |
|---|---|
| CO2 produces the required result without unacceptable heat effect or residue. | Keep CO2 as the primary source direction and size the source, optics and field around the qualified process and cycle requirement. |
| A selected synthetic or coated surface needs a cleaner fine-detail result than the first process provides. | Compare UV or another justified source direction before changing the workstation design. |
| Small characters or small code modules are difficult to reproduce consistently. | Review the optics, field-size tradeoff, working distance, focus stability and inspection method instead of increasing power by default. |
| Curvature or soft support causes focus and placement variation. | Add a support nest, fixture, Z/focus strategy or other geometry control appropriate to the part. |
| Part position or orientation varies between loads. | Improve the mechanical datum or evaluate vision positioning when mechanical location alone is not reliable. |
| Roll-fed or moving material must be marked without stopping the line. | Evaluate flying/online marking, encoder or trigger logic, web handling and extraction across the moving path. |
| Smoke, condensate or residue is high during the accepted process. | Increase attention to local capture, enclosure airflow, filtration, cleaning access and maintenance conditions in the machine package. |
| Manual loading cannot meet the required takt or changeover requirement. | Review tray loading, semi-automatic handling, multiple stations or a higher level of automation based on the real production sequence. |
| The real part, fixture or fabric panel needs more physical clearance than the flat sample used during process development. | Confirm the physical workpiece and fixture envelope separately from the marking field; review table size, Z travel or working-height clearance, fixture space and operator loading access before selecting the final machine form. |
| Variable data must be synchronized with production records. | Define software, trigger, reader and PLC/MES interfaces together with the marking workstation. |
A useful quotation should therefore be based on the qualified sample and production brief, not only on a material name or requested wattage. Zhuorui Laser can use the accepted test result to recommend the machine form, source direction, optics, fixture, positioning method, extraction and automation level that should be reviewed for the project.
Next Steps
Send the Product Task, Not Only the Material Name
For textile, leather and footwear applications, provide the product form, material and surface, mark content, target result, loading method, production rate and sample acceptance criteria. Those inputs make it possible to choose the right first test and turn the qualified result into a realistic machine configuration.
Prepare for faster review: product photos or drawings, material and surface details, artwork/code file, marked area and smallest feature, target effect, sample quantity, production rate, fixture or online needs, extraction concerns, voltage and destination.