
Laser Marking Machine Applications · Consumer Products
Laser Marking for Consumer Products & Personalization
If you produce branded, customized or short-run consumer goods, the useful question is not simply whether a laser can mark the product. You need to define the product material and surface, the artwork or data, the appearance you want, how the part will be positioned, how often designs change, and what a passing sample must prove before the machine is configured.
This page covers tumblers and cups, pens, phone cases, eyewear frames, gifts and promotional products. By the end, you should be able to turn “I want to personalize this product” into a practical test brief: material and surface → mark content → target result → geometry and loading → first laser route → acceptance criteria → final machine configuration.
Request a Quote Review Product & Marking Tasks
- Multi-material product scope
- Personalization and branding tasks
- Geometry and fixture decisions
- Sample test to machine configuration
Product Scope
Which Consumer Products Commonly Use Laser Marking and Personalization?
This application group is for factories, customization shops, brand suppliers and promotional-product producers that mark many product styles rather than one fixed industrial component. The product name helps define the handling problem, but the material and surface still determine how the laser can create the mark.
| Product group | Common material / surface examples | Typical marking task | Main production question |
|---|---|---|---|
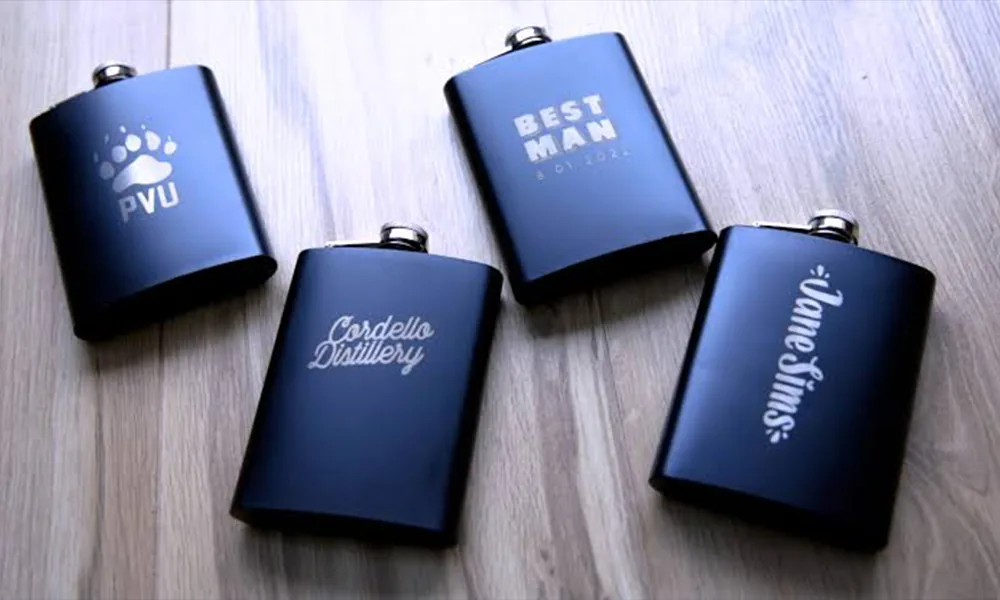
| Tumblers, cups and drinkware | Stainless steel, painted or powder-coated metal, anodized surfaces, selected plastics and glass | Names, logos, monograms, graphics, batch or product information | How will a round, tapered or handled product be rotated and kept in focus? |
| Pens and small cylindrical products | Metal, coated metal and plastic bodies | Brand logos, names, model text and promotional personalization | How will a small cylinder be located quickly without rotating or slipping? |
| Phone cases and small personal accessories | Plastic, coated surfaces, leather, metal inserts and mixed constructions | Logos, names, artwork, decorative patterns and selected variable data | How do you keep a cosmetic mark sharp without melting, halo or unwanted surface damage? |
| Eyewear frames and narrow curved parts | Metal, coated metal, acetate and selected engineering plastics | Small text, logos, model identification and branding | How do you hold a thin or curved frame at the correct angle and focal height? |
| Gifts and promotional products | Metal, wood, leather, acrylic, plastic, glass and coated products | Names, logos, graphics, event text, serials and short-run customization | How do you change fixtures, artwork and process recipes efficiently across many SKUs? |
Start with the actual product, not the category name. Two “gift products” can require completely different laser routes if one is powder-coated stainless steel and the other is wood. Product type defines geometry and handling; material and surface define the process response.
Why Mark
Why Are Consumer Products Laser Marked?
Consumer-product marking usually combines cosmetic value with flexible production. The mark may be decorative, identifying or data-driven, but the production advantage comes from changing digital artwork without changing a physical printing plate or stamp for every design.
- PersonalizationNames, initials, monograms, dates and customer-specific artwork for one-off or short-run products.
- BrandingPermanent or durable logos, brand marks and design elements integrated into the product surface.
- SKU and variant differentiationDifferent model names, color-series text, limited-edition graphics or campaign-specific artwork.
- Product identificationSerial numbers, batch references, product information or selected machine-readable codes when the business process requires them.
- Fast artwork changeoverDigital files can be switched between jobs, which is useful when orders are small and designs change frequently.
- Non-contact processingThe tool does not physically press against the product surface, although heat, ablation and focus still have to be controlled for the material.
The best reason to use laser marking is not “because it is permanent” in the abstract. It is when the required appearance, durability, changeover method and production volume can be reproduced on the real product with an acceptable process window.
Marking Content
What Is Usually Marked or Personalized?
The content determines the required feature size, visual quality, data handling and inspection method. A 40 mm decorative logo and a 2 mm line of model text do not place the same demand on the lens, focus, artwork preparation or fixture.
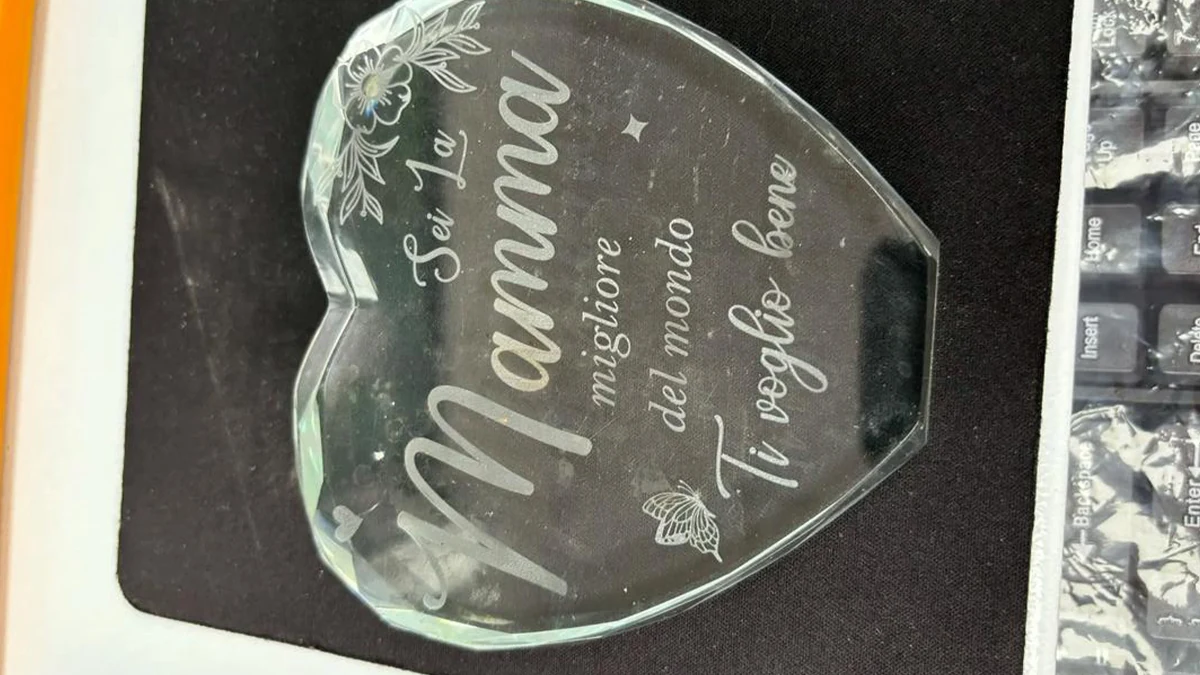
Name, initials or monogram
Used on personalized drinkware, pens, gifts and accessories.
Define before testing
Font, smallest stroke, mark size, placement tolerance and target contrast.
Logo or brand mark
Used on retail products, promotional items and private-label goods.
Define before testing
Vector artwork, fine details, fill areas, edge quality and color / contrast target.
Decorative graphic or pattern
Used on giftware, cases, drinkware and lifestyle accessories.
Define before testing
Overall field size, curved-surface distortion risk, fill density and acceptable surface texture.
Serial, batch or variable text
Used for limited editions, warranty references or production identification.
Define before testing
Data source, number format, update method and readability requirement.
QR or Data Matrix code
Used for product information, campaign links or traceability where required.
Define before testing
Code size, module size, data length, reader / verifier method and surface contrast.
Artwork should be tested at the real production size. A sample that looks clean at a large scale does not prove that a small logo, fine line or dense code will remain readable on the actual product.
Result Variables
What Determines the Laser Marking Result?
The same product category can produce very different results because the laser interacts with the actual substrate and finish, while the fixture and production method determine whether that result can be repeated from part to part.
Material
Record
Metal alloy, plastic grade, wood species, leather type, glass type or other substrate.
Material determines how energy is absorbed and which marking mechanisms are practical.
Surface and color
Record
Paint, powder coat, anodizing, plating, texture, polish, dye, color and any top layer.
The surface controls whether the process creates contrast, removes a layer, changes color or damages the finish.
Target appearance
Record
Dark / light contrast, coating removal, color change, shallow engraving, tactile depth or near-flat cosmetic mark.
The machine should reproduce the required effect, not merely create a visible mark.
Artwork and smallest feature
Record
Mark dimensions, line width, font size, code module, fill density and graphic complexity.
These details drive optical field, resolution, focus tolerance and practical marking time.
Geometry and marked location
Record
Flat, cylindrical, tapered, curved, recessed, narrow, flexible or height-varying surface.
Geometry determines fixture, rotary / 3D need, focal-height control and usable field.
Production requirement
Record
Pieces per batch, annual volume, design changes, SKU count, loading method, target cycle and automation level.
Production requirements connect the accepted mark to a practical workstation, changeover method and handling system.
Do not freeze the machine specification before these variables are known. “30 W laser for gifts” is not an application definition. A useful brief says what the product is made from, what is on its surface, what the mark must look like, how large it is, how the part is held and how production will run.
Target Result
What Marking Result Should You Define Before Testing?
“Looks good” is too vague for a repeatable personalization process. Define the visual and functional acceptance criteria before comparing laser sources or parameter sets.
- Contrast / color directionDark, light, exposed substrate, tone change or another defined visual result.
- Surface conditionNear-flat mark, controlled coating removal, shallow texture or intentional engraving depth.
- Edge qualityNo unacceptable halo, chipping, melt ridge, scorch border, burr or rough edge around fine artwork.
- Detail reproductionSmall text, thin lines, logos and codes must retain the required detail at final size.
- Placement repeatabilityThe mark must sit in the specified zone and orientation across the batch.
- Product-specific durabilityAbrasion, cleaning, washing, handling, sweat, weathering or other exposure is checked only where relevant to the end product.
When several colors, coatings or suppliers are used for the same SKU, define whether the acceptance rule must cover all variants. A process approved on one black coating does not automatically qualify a white coating, a different resin color or a different batch.
Geometry & Loading
How Do Product Shape, Positioning and Loading Affect the Mark?
A good sample result is not enough if the production part cannot be positioned at the same focal height and orientation. Consumer products often mix round, tapered, thin, curved and irregular shapes, so the fixture and loading method are part of the marking process.
| Geometry / production condition | Typical product example | What to evaluate |
|---|---|---|
| Stable flat surface | Phone case panel, flat gift tag, plaque or card | Simple nest or fixture, repeatable XY datum and fixed focal height |
| Round or cylindrical surface | Pen, bottle, straight-wall cup or cylindrical gift | Rotary / circumferential marking, chuck or support method, rotational alignment and seam position |
| Tapered or contoured surface | Tumbler, handled drinkware or curved case | Rotary strategy, focal variation, usable marking width and whether 3D / dynamic focus is needed |
| Thin, narrow or irregular part | Eyewear frame, clip, small accessory or irregular gift item | Custom nest, support points, clamp force, marked-face angle and repeatable datum |
| Position varies between parts | Hand-loaded mixed accessories or parts with loose placement | Vision positioning or a fixture that removes the variation more simply |
| Many SKUs and frequent changeovers | Personalization shops and promotional-product production | Quick-change fixtures, recipe management, adjustable Z height and clear operator setup references |
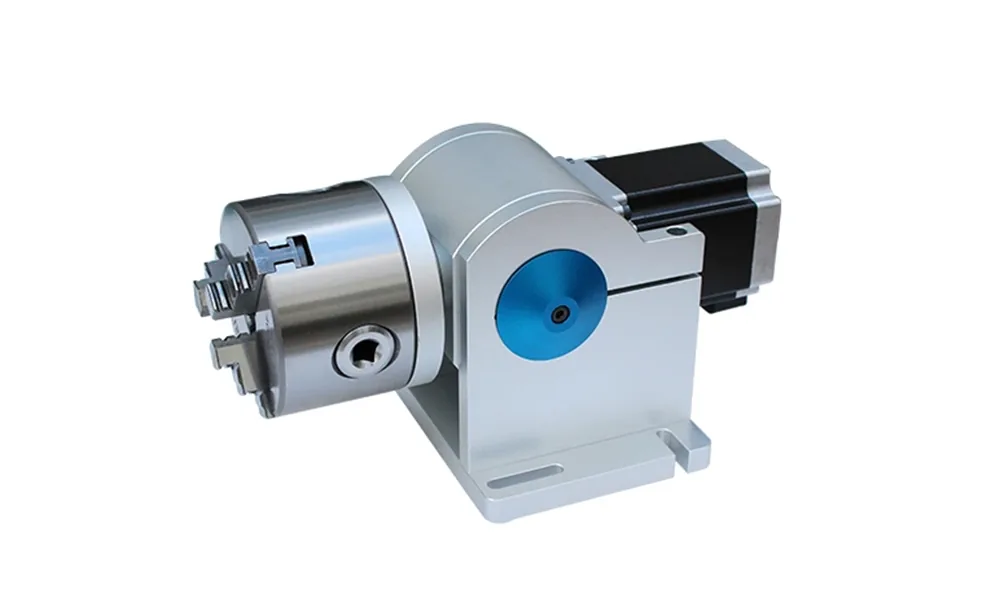
For short-run work, a simple fixture that loads quickly can be more valuable than a complex automatic cell. For high-volume repeat products, fixture repeatability, indexing and automation may matter more. The correct direction comes from the real batch size and changeover pattern.
First-Test Laser Route
Which Laser Should Be Evaluated First?
Choose the first test route from the material, surface and target effect — not from the fact that the object is a “gift” or “consumer product.” The table below is a starting direction for sample work, not a universal machine prescription.
| Material / surface condition | First route to evaluate | Typical target | What the sample must prove |
|---|---|---|---|
| Bare metal or metal accessory | Fiber laser; MOPA fiber where pulse control is useful | Contrast, engraving, fine logos, serials or decorative marks | Appearance, depth if required, edge quality, cycle time and absence of unacceptable surface damage |
| Painted, powder-coated, anodized or otherwise finished metal | Fiber / MOPA fiber as a common first test, then adjust route to the coating and desired layer response | Coating removal, exposed substrate, controlled contrast or decorative effect | Clean edge, controlled removal depth, no unwanted halo or substrate damage, and consistent result across the finish |
| Engineering plastic or molded polymer | UV or fiber / MOPA depending polymer, color, additives and target effect | Color change, contrast, fine text or logo with controlled heat input | Contrast, detail, melt / foam / burn behavior, surface texture and repeatability on the actual grade and color |
| Wood, leather, paper and many organic gift materials | CO₂ laser as a common starting route | Darkening, engraving, decorative graphics and branding | Edge quality, scorch level, residue, odor / extraction needs, depth and surface feel |
| Glass or transparent decorative products | UV or CO₂ depending glass construction, desired effect and machine configuration | Surface mark, frost-like effect, fine graphics or other controlled appearance | Crack / chip risk, contrast, edge quality, focal tolerance and acceptable cosmetic finish on the real glass |
MOPA is a fiber-laser configuration, not a separate material category. Source family, wavelength, pulse behavior, power class, lens and process parameters are different decisions. The first test should compare routes that are technically plausible for the actual surface and desired result.
Failure Modes
What Commonly Goes Wrong in Consumer-Product Laser Marking?
A failed mark is useful information if it tells you whether the problem comes from material response, process energy, focus, geometry, fixture repeatability or production variation. Diagnose the visible symptom before changing the machine specification.
| Observed problem | Likely causes to distinguish | Check first |
|---|---|---|
| Mark is too light or low contrast | Material / additive mismatch, wrong process route, insufficient interaction, excessive speed or out-of-focus surface | Confirm exact material and surface, then compare a controlled parameter matrix rather than only increasing power |
| Plastic melts, foams excessively or develops a halo | Too much local heat, unsuitable pulse regime, slow scan, repeated overlap or heat-sensitive resin | Reduce heat accumulation, confirm the polymer and target effect, and compare only the laser routes that are technically plausible for that specific material / surface; this may include UV versus fiber / MOPA where appropriate |
| Coating removal has ragged edges or burns into the substrate | Energy density too high, coating thickness variation, focus error or scan / fill strategy not matched to the layer | Inspect the coating and exposed substrate under close view, then reduce the process window away from the damage boundary |
| One side of a round product is sharp and the other is weak | Curvature, taper, rotary centering, focal-height variation or artwork mapping | Check centerline, diameter / taper, rotary alignment and focal position before changing laser power |
| Rotary artwork does not close cleanly or spacing changes around the product | Incorrect diameter / circumference, slippage, rotary calibration or geometry mismatch | Verify actual workpiece dimensions, gripping method and rotary calibration with a repeatable reference mark |
| Mark position moves between pieces | Loose fixture, inconsistent loading datum, product tolerance or operator variation | Separate fixture error from part variation; improve mechanical location before adding vision unnecessarily |
| Same recipe gives different results on another color or batch | Different pigment, additive, coating thickness, resin batch, surface finish or supplier | Record material / batch identity and requalify the variant instead of treating it as a machine fault |
| Fine text or logo detail fills in or disappears | Feature size too small for the chosen field / spot, artwork quality, focus error, excessive heat or dense hatch settings | Test the final-size artwork and compare optics / focus / hatch strategy before accepting the sample |
Production Workflow
How Does a Personalization Process Move Into Production?
Consumer-product production is often a mix of repeat SKUs and changing artwork. A reliable workflow therefore has to control both the physical part and the digital job file.
- Identify the SKU and material conditionConfirm product version, material, color, coating / finish and any batch information that affects the process.
- Preflight artwork or variable dataCheck file format, mark dimensions, smallest feature, orientation, text fields and any serial / QR data before the part reaches the marking station.
- Load and locate the productUse the approved nest, V-block, rotary fixture, custom support or vision method so the marked surface reaches the same position and focal height.
- Load the approved process recipeSelect the recipe tied to the material / surface and artwork class; confirm lens, focus, rotary settings and any fixture reference.
- Mark the productRun the accepted process window rather than a visually improvised setting.
- Inspect the resultCheck appearance, position, detail and code readability when applicable. Reject criteria should be defined before production begins.
- Record and change overKeep the accepted recipe, fixture setup and inspection rule with the SKU so the next batch or artwork change starts from a controlled baseline.
- Add automation when handling, repeatability or throughput requires itReview indexing, vision, multiple fixtures or an automatic marking cell when manual handling, position variation, inspection requirements or production rate becomes the limiting factor.
Cycle time should include artwork / data change, loading, positioning, marking, inspection and unloading. For short-run personalization, reducing setup and changeover time may have more value than reducing laser scan time by a small amount.
Sample Acceptance
How Should Representative Product Samples Be Qualified?
A useful sample test does more than produce one attractive mark. It records what was tested, explores the boundary around the preferred result, and checks whether the chosen process can be repeated on the actual product and the variants you plan to sell.
Use production-representative samples
- Send the real material and finish, including color, coating, plating, texture or other surface treatment.
- Include the real product geometry or a sample that reproduces the same marked surface and focal condition.
- Test the actual artwork size, smallest text / line and any code module you intend to produce.
- If several colors, batches or suppliers are important, include representative variants rather than qualifying one sample and assuming the rest are identical.
Define the acceptance checks before testing
- AppearanceContrast / color, edge quality, fill consistency, surface texture and cosmetic defects.
- DetailSmall text, thin lines, logos and dense artwork remain legible at final production size.
- PositionPlacement and orientation stay inside the defined tolerance on repeated parts.
- Functional surfaceNo unacceptable melt, crack, burr, coating damage, distortion or loss of product function.
- Durability where relevantAbrasion, cleaning, washing, handling or environmental exposure is checked against the actual end-use requirement.
- Production repeatabilitySeveral consecutive parts are marked using the same fixture and recipe to confirm the result is not a one-piece success.
A single good-looking coupon is not the end of qualification. The accepted process should have enough margin that normal material, loading and operator variation do not push production directly into the failure condition.
What to send for a useful sample test
| Input | What to provide | Why it matters |
|---|---|---|
| Product | Product type, photos / drawings, dimensions and marked location | Defines geometry, fixture, usable field and focal-height requirements |
| Material and surface | Material grade / family, color, coating, finish, supplier or batch information where known | Defines which laser routes are technically plausible and what process variation must be covered |
| Artwork / data | Vector logo, text, graphic, serial format or code file at real production size | Sets resolution, field and marking-time requirements |
| Target result | Reference photo or written acceptance rule for contrast, color, depth, edge quality and surface condition | Prevents “visible mark” from being confused with the result you actually want to sell |
| Production context | Batch size, annual volume, SKU count, changeover frequency, loading method and target cycle | Connects the sample result to workstation structure, fixture strategy and automation level |
| Acceptance / durability | Inspection method and any abrasion, cleaning, washing, code-readability or environmental requirement | Defines what counts as an approved sample rather than an attractive demonstration |
Test Result → Machine Configuration
How Do Sample-Test Results Determine the Final Machine Configuration?
The machine should reproduce the accepted sample on the real product at the required size, loading method and production rate. The final configuration therefore follows the test evidence instead of starting from a preferred wattage or machine frame.
| Confirmed by test or production review | Configuration decision | Why it matters |
|---|---|---|
| Accepted laser route and usable process window | Laser source family, suitable power class and pulse / parameter control range | The machine must reproduce the approved effect with process margin, not operate at a fragile one-setting limit |
| Mark size and smallest feature | Lens, marking field, focal strategy and resolution requirement | Field size and fine-detail performance must match the real artwork instead of being chosen independently |
| Round, tapered or curved product | Rotary axis, chuck / support method, working height, or 3D / dynamic-focus option where justified | Geometry determines whether the mark stays in focus and correctly mapped across the surface |
| Product dimensions, operator access and loading clearance | Working height / Z travel, enclosure or workstation format, door opening, rotary clearance and loading access | The accepted process still has to physically accommodate the real product, including tall parts, handles, fixtures and the operator or loading method |
| Placement tolerance and loading variation | Simple fixture, custom nest, quick-change tooling or vision positioning | Mechanical control should be used when it solves the variation simply; vision is added when position cannot be controlled reliably by fixture alone |
| Many SKUs or frequent artwork changes | Recipe management, variable-data workflow, quick-change fixtures and operator setup references | Changeover can dominate productivity in personalization work even when laser scan time is short |
| Required batch output / cycle time | Appropriate source and scan strategy, fixture count, rotary indexing, multiple-position loading or automation level | Throughput must include loading and inspection, not only the laser’s marking speed |
| Smoke, odor or debris observed during testing | Extraction, filtration and workstation airflow requirements | The accepted process has to run cleanly and safely enough for the material and production environment |
| Code or inspection requirement | Reader, camera, inspection interface or data connection where the job requires it | Machine-readable marks and variable data need an inspection and data workflow, not only a visible laser mark |
The useful end point is a configuration decision backed by a representative sample. If the sample proves the source, optics, process window, geometry handling, cycle and acceptance method, the quotation can be built around those confirmed requirements instead of a generic machine recommendation.
Next Steps
Turn Your Product Into a Testable Marking Brief
Send the real product or representative samples together with the material / surface information, artwork, target appearance, marked area, batch size and production method. Zhuorui Laser can use those inputs to compare a practical laser route, sample result and machine configuration.
Prepare for faster review: product photos / drawings · material and surface · artwork or code file · mark size and smallest feature · target result · product geometry · batch / annual volume · changeover frequency · sample quantity · durability / inspection requirement.