
Organic Material Compatibility
Organic Materials Laser Marking
Wood, leather, paper, textiles and cork are organic materials, but they do not share one universal laser setting. CO₂ marking is commonly the first source direction to evaluate because many organic surfaces absorb CO₂ infrared energy well. Exact composition, finish, target effect and smoke-control requirements still need a representative sample test.
Start with the actual material: confirm the substrate, surface finish, desired mark and smoke/fume requirements on a production-representative sample before finalizing the machine setup.
Request a Quote Contact UsQuick Answer
Start with the Exact Organic Material and Surface
A material-family name is only a screening input. Wood species and grain, leather tanning and finish, paper basis weight and coating, textile fibre blend and weight, and cork density can all change heat flow and appearance.
CO₂ is commonly the first source family to evaluate for many organic surfaces. If you are evaluating wood, use the Wood guide below for species-specific details. The direction is not a guarantee: actual wavelength, optics, parameters and extraction setup must be confirmed on representative production material.
For a useful first decision: identify the exact substrate and finish, then define the required mark. Product handling, line integration and automation can be reviewed after material compatibility is established.
Materials & Marking Examples
Choose the Specific Organic Material Route
Start with the substrate that matches the production part. Each route below combines the main material variables with real laser-marking examples, then links to the material-specific guide for deeper process and sample-test details.
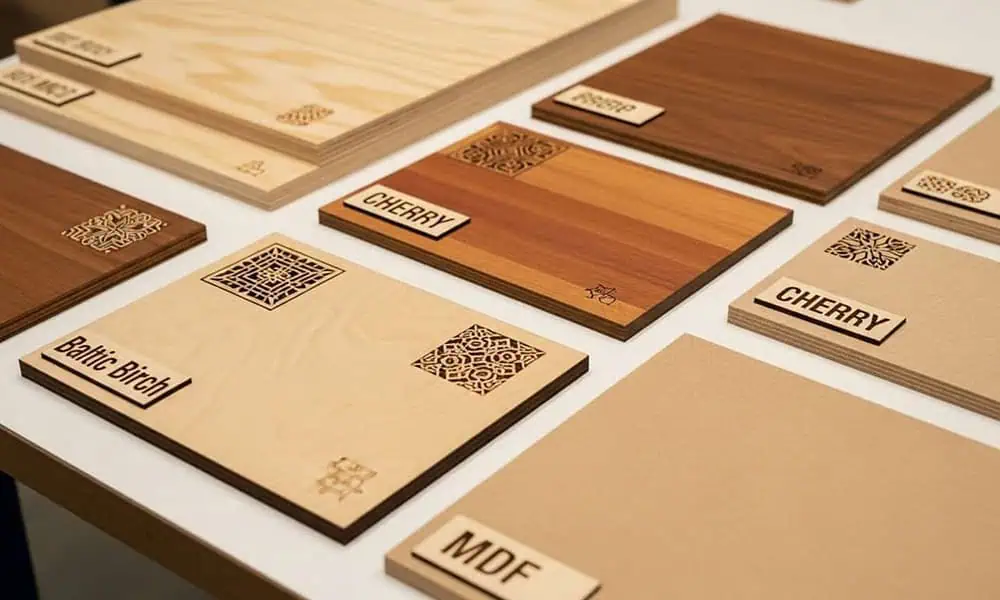
Wood Laser Marking
Species, grain, moisture, resin and surface finish affect carbonisation, contrast and smoke. Start with the production species, not a generic plaque.
Explore wood behaviour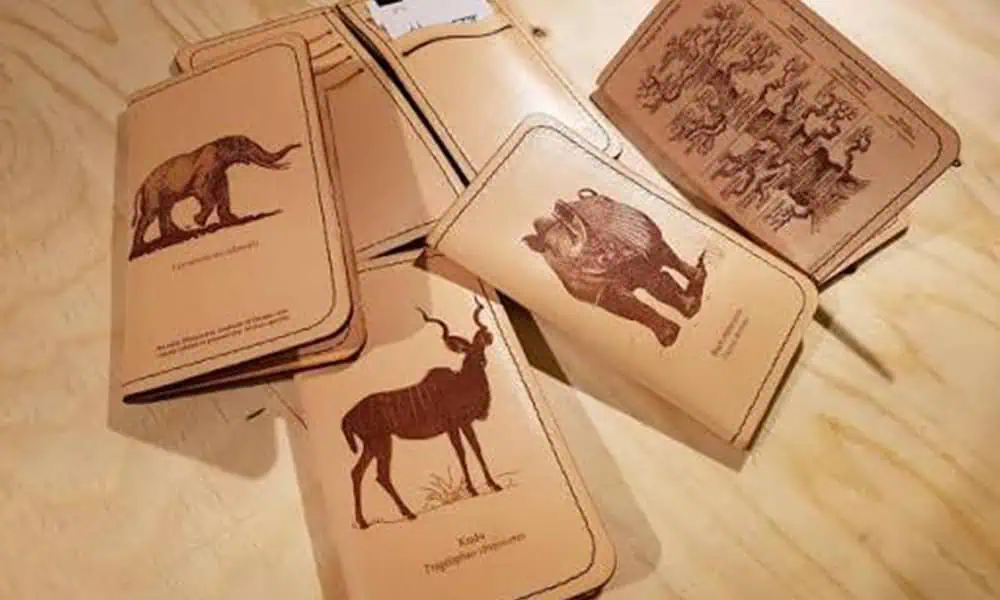
Leather Laser Marking
Tanning method, dye, topcoat and thickness affect colour change, odour and edge quality. Verify each finish as a separate material case.
Explore leather behaviour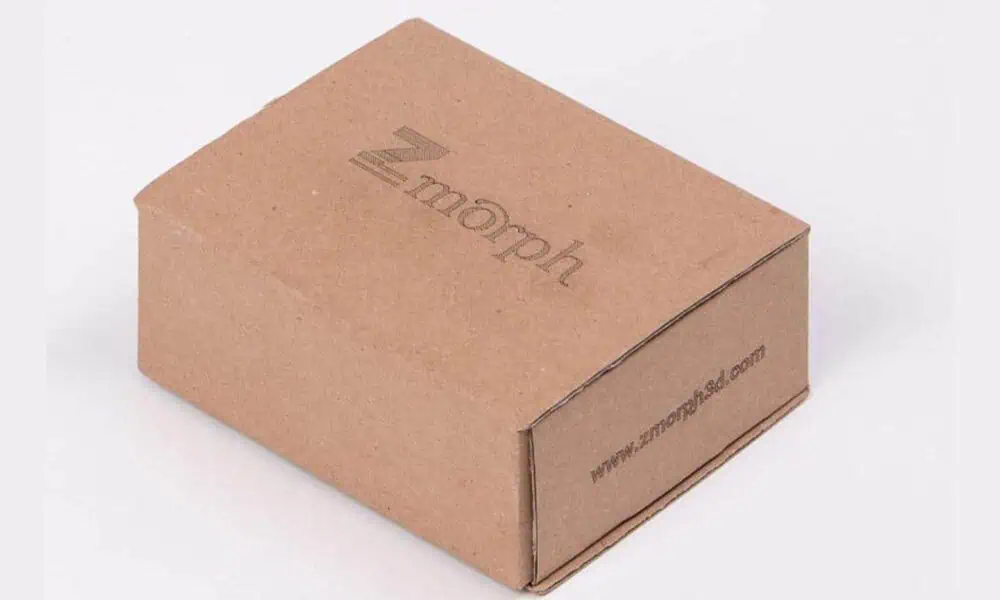
Paper and Cardboard
Basis weight, coating, colour and combustible surface determine the usable heat window. Confirm browning, edge quality and residue on the final production stock.
Explore paper behaviour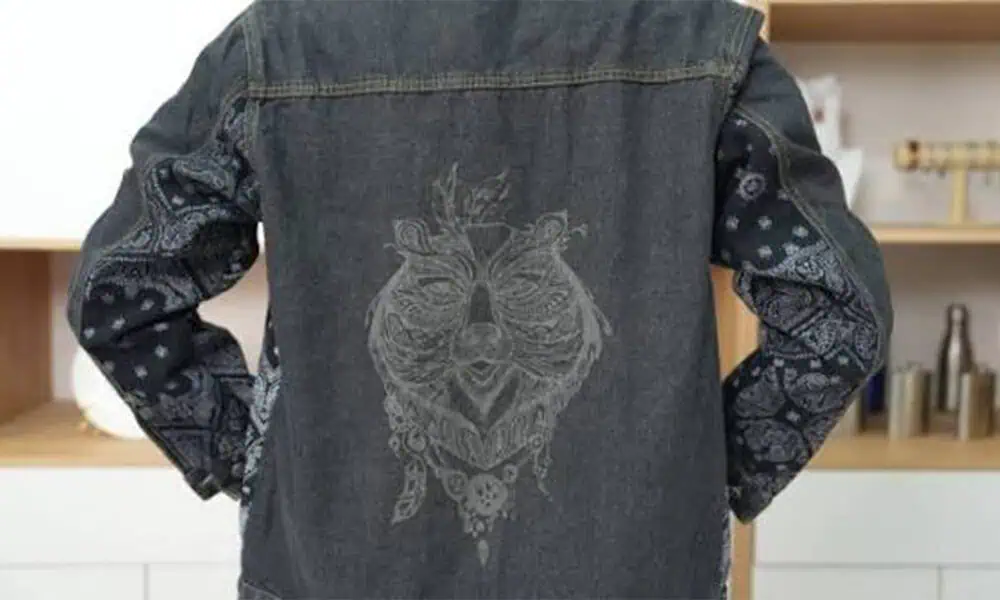
Fabrics and Textiles
Fibre blend, fabric weight, tension and finish change melting, scorch, shrinkage and detail. For continuous fabric handling or line integration, evaluate the production workflow separately from material compatibility.
Explore textile behaviour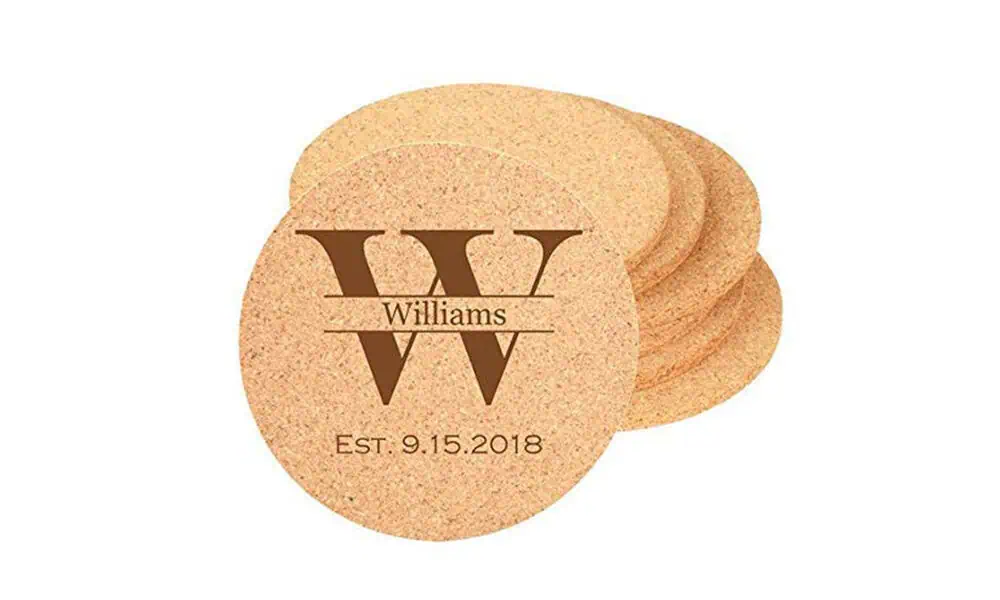
Cork Laser Marking
Density, granule structure and dust/char behaviour can move the process window. Test the actual cork grade and surface because visible contrast can vary across the material.
Explore cork behaviourProducts and Use Cases
Where Organic Materials Are Commonly Marked — and Why
Organic materials appear in products that need branding, identification, decoration or variable information. Production handling, positioning and inspection requirements vary by product, while the substrate still determines whether the mark can be made cleanly and repeatedly.
Wood products
Plaques, furniture parts, handles, gift items, presentation boxes and wooden packaging are commonly marked for logos, identification, decorative graphics or personalization.
Leather goods
Bags, belts, footwear components, wallets, labels and accessories may use laser marking for logos, product identity, decorative patterns or personalized text.
Paper and cardboard
Boxes, sleeves, cards, tags and paper labels may need text, batch information, simple graphics or codes without adding ink or a separate label.
Textiles and fabric parts
Fabric labels, patches, garment components and textile accessories may be marked for identification, branding or graphics when the fibre and finish tolerate the required heat input.
Cork products
Coasters, closures, gift items and cork accessories can use laser marks for logos, names and decorative graphics, but density and granule structure can change contrast and edge quality.
Material decision first: if the product uses a coating, laminate, adhesive or mixed material stack, test the complete finished surface rather than assuming the base organic material will control the result.
Typical Mark Content
What Is Usually Marked on Organic Materials?
Define the information or graphic before testing. The smallest feature, required contrast and inspection method can change the acceptable process window even on the same substrate.
Logos and brand marks
Common for wood, leather, cork and premium paper products where visual consistency and edge quality matter.
Text and product information
Names, model information, care information or short instructions require readable character edges without excessive scorch or melt.
Serial and batch information
Variable identifiers can be marked when the surface provides enough contrast and the production workflow can present each part consistently.
Decorative graphics
Patterns, illustrations and personalized artwork may require a wider tonal window than simple text, especially on grainy or fibrous surfaces.
QR, Data Matrix or barcodes
Possible only when module size, contrast, surface texture and heat spread still allow reliable reading. Validate with the actual code size and scanner requirement.
Symbols and identification marks
Simple icons, alignment marks or product identifiers are often tolerant of moderate colour variation, but the acceptance rule should still be defined before production.
Engineering Decisions
Match the Mark Mechanism to the Surface
Start with the visible result you need, then match it to the material response. Marking, shallow engraving, cutting and perforating are different process decisions.
Desired Marking Results
Common targets include a dark high-contrast mark, a lighter colour change, shallow engraved texture, clean coating removal, fine graphics or readable codes with minimal scorch, residue or distortion.
| Effect | What changes | Main material risk | Sample check |
|---|---|---|---|
| Carbonisation or burn-off | Darkens or removes a shallow surface layer on selected organic surfaces. | Scorch halo, excessive char, odour and loss of edge detail. | Contrast, edge sharpness, residue and cleanability. |
| Surface colour change | Creates a lighter, darker or warmer tone without intending deep removal. | Uneven colour, yellowing or visible heat spread. | Colour uniformity across grain, fibre direction and batches. |
| Engraving or relief | Removes more material to create touchable depth or texture. | Slow cycle, debris, fragile edges and dimensional variation. | Depth/profile, debris control and durability. |
| Coating or finish removal | Removes a paint, topcoat, laminate or surface layer while protecting the substrate. | Uneven removal, exposed colour mismatch, fumes or substrate damage. | Layer consistency, adhesion after marking and odour. |
| Fine graphic or code detail | Uses controlled heat and focus to preserve small lines, text or symbols. | Blurred detail, melt, burn-through or poor readability. | Smallest feature, contrast and inspection result. |
Process scope: this guidance applies to marking, shallow engraving and related surface effects. Cutting and perforating require separate process and equipment evaluation.
Process Window
Material Variables That Change the Process Window
The same family name can hide a different absorption, heat-flow and surface-risk profile. Record these variables before asking for a machine recommendation.
Composition and grade
Species, fibre, tanning system, paper stock, adhesive, filler and recycled content can change absorption.
Surface stack
Paint, varnish, laminate, foil, dye, waterproofing or a textile coating may respond before the base material.
Moisture and batch
Wood moisture, leather lot, paper humidity and textile finish can move the acceptable parameter window.
Geometry and handling
Flexible sheets, grain direction, curved goods and thin stock may need tensioning or a light fixture.
Acceptance criteria
Define contrast, edge, depth, hand feel, wash/abrasion resistance, readability and cosmetic limits before testing.
Smoke and fire controls
Combustible material, char, dust and unknown coatings affect extraction, enclosure and operating controls.
Part Geometry and Handling
How Shape, Thickness and Size Change the Marking Setup
Material compatibility is only part of the decision. Part shape, local height variation, thickness, flexibility and overall size determine how the workpiece is held, focused and moved through the marking area.
| Part condition | What changes | Typical setup implication | What to verify |
|---|---|---|---|
| Flat sheets or panels | Usually provide the simplest focus and fixture condition. | Flat support, repeatable datum and suitable marking field may be enough. | Flatness, focal position and whether the full mark fits the selected field. |
| Curved or cylindrical parts | The surface can move away from the focal plane across the mark. | A rotary fixture, indexed repositioning or another focus-management approach may be required. | Curvature, mark width around the part and acceptable focus variation. |
| Thin paper, fabric or leather | Lower thermal mass increases burn-through, distortion, shrinkage or edge damage risk. | Use a low-damage process window plus flatness or tension control. | Heat damage, hand feel, holes, shrinkage and handling repeatability. |
| Thick or tall parts | Overall thickness affects loading height and focal positioning even when the mark itself is shallow. | Check column travel, working clearance and fixture height. | Part clearance, focal access and loading ergonomics. |
| Large workpieces | Physical part size can exceed the convenient work area even when the mark itself is small. | Choose the marking field for the mark, then solve workpiece support, repositioning or motion separately. | Actual mark area, part envelope, access around the head and repeatable positioning. |
| Flexible or roll-fed material | Wrinkles, tension and motion can change focus and mark position. | May require tensioning, web handling, conveyor or flying-marking evaluation. | Flatness, speed stability, trigger timing and mark placement. |
Do not size the laser only from the workpiece dimensions: the required marking field, smallest feature, part envelope and handling method are separate decisions and should be reviewed together.
Risks & Troubleshooting
Common Risks & Failure Modes
Most organic-material failures are signs that the material, surface condition, heat input, focus or extraction condition is outside the usable process window. Use the symptom to decide what to check next.
| Problem | Likely causes | What to check next |
|---|---|---|
| Weak or inconsistent contrast | Material formulation, finish, moisture or insufficient interaction with the selected source. | Confirm the exact substrate and coating, then compare source route and process window on the real sample. |
| Scorch halo or excessive darkening | Too much local heat, slow travel, repeated exposure or heat spreading beyond the intended mark. | Reduce heat accumulation and verify speed, power, repetition, focus and airflow one variable at a time. |
| Burn-through or holes | Thin stock, low thermal mass or excessive energy density. | Review thickness, support, focus and the low-damage parameter window. |
| Melting, shrinkage or stiff hand feel | Synthetic fibre, thermoplastic layer or too much heat input. | Confirm fibre blend or coating and reduce thermal load while checking whether another source route is justified. |
| Uneven colour across the part | Grain, moisture, dye, coating, texture or batch variation. | Compare representative areas and multiple pieces rather than approving one visually favourable spot. |
| Heavy smoke, residue or persistent odour | Material decomposition, coating/adhesive chemistry or inadequate extraction. | Review the material/SDS, airflow, filtration and residue-cleaning requirement before production trials. |
| Blurred detail or unreadable code | Feature size too small, low contrast, rough texture, focus error or excessive heat spread. | Verify actual code size, smallest feature, optics/field, focus and scanner acceptance on the final surface. |
Fume and Fire Controls
Organic-material marking can create smoke, odour, condensate, char and combustible residue. The amount and composition depend on the exact substrate and finish, so extraction and fire-control requirements should be reviewed before production testing.
- Hold unknown coatings, adhesives, treated leather and mixed composites until material information and SDS are reviewed.
- Do not treat wood, paper or textile dust and char as harmless simply because the substrate is natural; include extraction and residue control in the process plan.
- Review combustible-material handling and unattended-operation limits with the responsible safety person; the final laser safety classification depends on the complete system.
- For synthetic textiles, laminates or coated surfaces, confirm fume and filtration compatibility before production trials.
Safety note: final extraction, filtration, enclosure and operating controls depend on the complete machine, material SDS and local risk assessment.
Production Configuration
CO₂ First, Configuration Second
CO₂ is commonly the first source family to evaluate for wood, leather, paper, textiles and cork, but “CO₂” is not a performance guarantee. The actual wavelength, optics, power class, enclosure, extraction and process window depend on the supplied machine and the material test.
Fiber or UV may deserve a controlled comparison for a special coating, fine heat-sensitive detail or surface effect. They should not replace a sample-led decision. For model-level specifications, compare the available CO₂ laser marking machine configurations. If the part needs web handling, rotary positioning, vision, motion or automation, review those requirements with the relevant solution options.
Request a machine review OEM & Custom Inquiry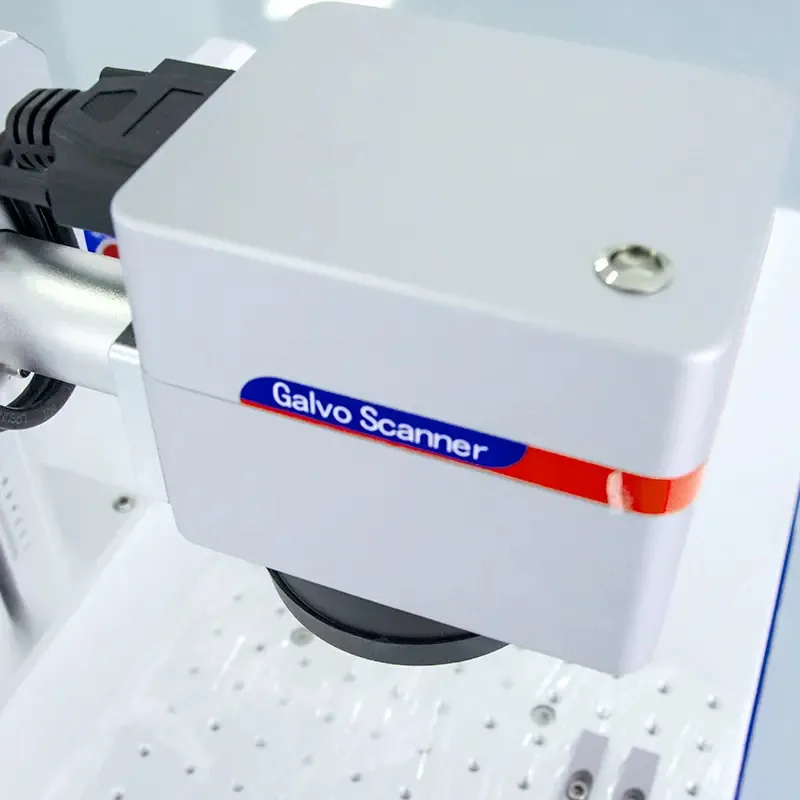
| Material condition | Possible first direction | Main risk | Must verify |
|---|---|---|---|
| Natural wood, cork or untreated paper | CO₂ screening with controlled heat and extraction. | Char spread, residue, smoke and fire risk. | Contrast, edge, char clean-up and repeatability. |
| Finished or coated wood, leather or paper | CO₂ test matched to the finish/substrate stack. | Uneven removal, odour or substrate exposure. | Layer consistency, cosmetic limit and adhesion. |
| Natural or blended textile | CO₂ screening at a low-damage parameter window. | Melting, scorch, holes, shrinkage or stiff hand feel. | Detail, hand feel, wash/abrasion response and batch variation. |
| Fine detail or heat-sensitive surface | Compare CO₂ with another available source only through a sample matrix. | Slow cycle, weak contrast, haze or heat damage. | Smallest feature, contrast and production cycle. |
Sample Validation Process
How to Confirm the Result on a Real Production Sample
A good-looking coupon is not enough. Validation should use the real substrate and finish, a defined acceptance target and enough repeat testing to show that the result can survive normal material and production variation.
Use the real material
Test the production species, fibre, stock, coating, dye, laminate or finish. A visually similar sample can respond differently under the same laser condition.
Define acceptance first
Set the target contrast, colour, depth, smallest feature, code readability, residue limit and cosmetic damage limit before comparing settings.
Run a controlled test matrix
Compare source route and process variables systematically rather than changing several settings at once. Keep extraction and focus conditions documented during the trial.
Inspect more than appearance
Check edge quality, residue, hand feel, burn-through, distortion and any required abrasion, flex, wash or scanner performance that matters to the real product.
Repeat on representative parts
Confirm the accepted result on multiple pieces or relevant batches when grain, moisture, coating, fibre blend or other natural variation can move the process window.
Freeze the approved condition
Record the material and finish, machine/source route, lens or field where relevant, fixture method, accepted result and controlled parameter recipe for production use.
Approval rule: do not approve the process from appearance alone if the final part also requires scan readability, abrasion resistance, wash resistance, flex performance or another end-use condition.
Sample Validation
Minimum Inputs for a Useful Organic-Material Test
A useful sample test starts with the final material and a defined target result. Sending only “wood,” “leather” or “fabric” often leads to a weak recommendation.
| Input | What to provide | Why it matters |
|---|---|---|
| Substrate | Exact species, fibre, stock, grade, supplier and batch. | Prevents a family name from hiding a different material response. |
| Surface | Finish, coating, dye, laminate, waterproofing, texture and cleaning state. | Defines which layer will absorb or decompose first. |
| Thickness / weight | Board thickness, leather thickness, paper basis weight, textile GSM and flexibility. | Sets heat spread, burn-through and handling risk. |
| Target result | Contrast/colour, depth, line width, artwork, code size and cosmetic limits. | Maps the material to a mark mechanism and inspection method. |
| Durability | Wash, abrasion, flex, solvent, outdoor or downstream-finishing exposure. | A readable mark can still fail its real end-use test. |
| Production and safety | Piece/web handling, cycle target, extraction, SDS and restricted substances. | Connects the material result to a safe, repeatable machine setup. |
Approval note: a single coupon represents one material, finish, batch and parameter set. Final approval should use production-representative samples and agreed acceptance criteria.
From Test Result to Equipment
How the Approved Sample Becomes a Machine Configuration
Once the material and target result are proven, the machine should be configured around the accepted process window, marking area, part handling, extraction requirement and production target — not around power alone.
| Decision | What should drive it |
|---|---|
| Laser source route | The source that produced the accepted mark on the actual material and finish. |
| Power class | Required process window, target depth or colour response, cycle target and usable operating margin — not a simple “more power is better” rule. |
| Lens / marking field | Actual mark size, smallest feature, required detail and acceptable field-dependent spot performance. |
| Fixture / rotary / handling | Part shape, orientation, repeatable datum, curvature, flexibility and loading method. |
| Extraction and enclosure | Smoke, odour, residue, coating chemistry, production volume and complete-system safety review. |
| Automation level | Throughput, part presentation, variable data, trigger method, conveyor/web motion, vision need and integration scope. |
For a useful quotation, provide:
- Exact material, finish and representative sample.
- Part dimensions and photos or drawing of the marking area.
- Artwork, text or code with the smallest required feature.
- Target mark appearance, depth and durability requirement.
- Required marking area and expected production cycle.
- Loading method, fixture constraints and any conveyor or rotary need.
- Extraction, enclosure, safety or integration constraints already known.
Configuration note: sample approval proves a material/process direction. Final machine selection still depends on workpiece handling, field size, production flow and complete-system safety requirements.
Need production-line integration? If material compatibility is already confirmed and the remaining question is product handling, traceability, conveyor motion, vision or automation, continue to Applications or Solutions for the production workflow.
Frequently Asked Questions
Organic Material Laser Marking FAQs
Is a CO₂ laser suitable for wood, leather, paper and textiles?
CO₂ is commonly the first source family to evaluate for many organic surfaces, but suitability depends on the exact species, finish, fibre, thickness, target effect and smoke-control setup. Test the production material before selecting a configuration.
Can one CO₂ setting mark every organic material?
No. Wood grain and moisture, leather finish, paper stock and textile blend can all change the process window. Use separate material routes and keep an accepted parameter record for each production variant.
Why do brown edges, scorch or holes appear?
Heat has spread beyond the intended mark or the energy is too high for the material thickness and surface. Power, speed, focus, repetition and extraction interact, so correct one variable at a time on a representative sample.
Do organic materials need fume extraction?
Plan extraction for smoke and odour, especially with coated, synthetic, adhesive-containing or high-volume work. Required airflow and filtration depend on the material and machine; review the complete setup and SDS where applicable.
Can leather or textiles be marked without damaging the surface?
Sometimes, but the acceptable window can be narrow. Tanning, topcoat, fibre blend, weight and target appearance determine whether the result is a clean colour change, burn-off, melt or unacceptable damage. Sample validation is essential.
Is the same setup suitable for laser cutting or perforation?
Not necessarily. Cutting and perforating use different process windows and equipment considerations from marking or shallow engraving, so evaluate them as separate requirements.
Prepare a Useful Test
Send the Actual Material, Surface and Mark Requirement
Provide a production-representative sample, artwork or code, target effect, material/finish information, durability requirement, cycle expectation and SDS or extraction constraints.