
Leather Laser Marking
Many genuine leathers and PU-based synthetic leathers can be evaluated for laser marking, but the material must be identified before testing. Tanning chemistry, dye, topcoat, backing, adhesive, thickness and the required mark effect can change both the result and the safety decision; confirmed PVC-containing constructions should not enter a routine laser trial.
Request a Material TestSee Sample InputsCan Leather Be Laser Marked? First Identify What the “Leather” Actually Is
The answer is often yes for genuine leather and many PU-based synthetic leathers, but not every material sold as leather should enter a laser test. The base material, tanning chemistry, pigments, coating, backing and adhesive determine both the visible mark and whether a trial is appropriate.
Genuine leather: test after confirming the finish
Full-grain, top-grain, split and other genuine leathers can respond differently because fibre structure, tanning chemistry, moisture, dye and protective finishes change carbonisation, colour shift, edge quality and odour. Treat each grade and finish as its own test condition.
PU-based synthetic leather: conditional test candidate
PU skins and coated fabrics may be suitable for controlled trials, but the PU layer, pigments, backing cloth, adhesive and additives can melt, bubble, discolor or delaminate. Confirm the construction and safety documentation before selecting a laser route.
PVC-containing synthetic leather: do not treat as a routine laser trial
If the material is confirmed to contain PVC, stop the normal test path and review the material and safety documentation instead of proceeding as if it were ordinary PU leather. PVC-containing constructions can generate hazardous decomposition products and can also damage extraction or machine components.
Unknown “synthetic” or “vegan leather”: identify first
Commercial names do not define the polymer. If the composition is unknown, confirm whether the surface is PU, PVC or another composite and review the backing, adhesive, flame-retardant treatment and other additives before any laser trial.
Before testing: identify the material construction, define the target mark and check the supplier SDS or composition information where synthetic layers, coatings, adhesives or restricted substances may be present. A successful mark on one leather grade does not qualify another grade, colour or finish.
Where Is Leather Laser Marking Used — and Why?
The material decision starts with the leather, but the mark exists for a product reason: branding, personalization, identification, decorative differentiation or traceability. The finished product also determines handling, inspection and durability requirements.
Leather goods
Bags, wallets, belts, watch straps, cases and accessories are commonly marked for logos, decorative graphics, personalization and product identification. Cosmetic quality, edge cleanliness and resistance to rubbing are often more important than maximum marking speed.
Footwear
Leather or synthetic-leather uppers, tongues, panels and other components may need branding, decorative patterns, size/style identification or production identification. Curvature, seams and mixed materials make fixture and focus control more important than on a flat coupon.
Automotive, upholstery and interior trim
Leather seating and trim components may require decorative patterns, branding or part identification. Large areas, assembled geometry, appearance standards and long-term rub/flex exposure should be validated on the actual production construction.
Product context changes the acceptance rule: the same visible mark may be acceptable on a decorative tag but unacceptable on a high-flex shoe upper or premium interior trim. Use the product application to define handling, cycle time, fixture, inspection and durability requirements, then validate those requirements on the exact leather condition.
What Is Usually Marked on Leather?
The artwork is not just a graphic choice. Feature size, information density and readability requirements change how much heat can be tolerated and how the mark should be inspected.
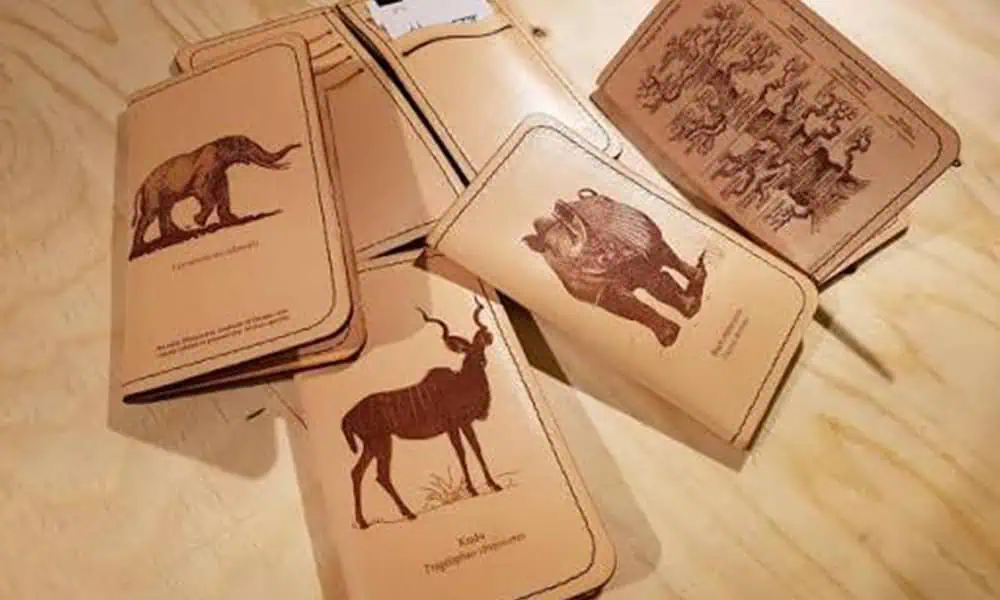
Brand logos
Logos on bags, belts, footwear and trim usually prioritize clean edges, consistent tone and minimal damage to the surrounding grain or coating.
Decorative graphics and patterns
Textures, motifs and repeated patterns add larger marked areas and more heat accumulation, so uniformity across the whole design matters.
Names, initials and personalization
Personalized text needs stable positioning and repeatable contrast, especially when the part shape or surface grain changes from piece to piece.
Product or part identification
Model, size, style or internal identification marks need to remain legible after normal handling, flexing and cleaning.
Serial, batch or traceability data
Variable data adds software and data-handling requirements in addition to the material test. The mark must remain readable under the intended production inspection method.
Barcodes and 2D codes
Codes require enough contrast, quiet-zone integrity and feature definition for the intended reader. Do not approve a code from appearance alone; verify the real code size and reading condition.
Why this matters: a 40 mm decorative logo and a small serial or 2D code can be on the same leather but require different focus, heat input, inspection and fixture control. Submit the real artwork or code dimensions during sample testing.
What Marking Result Do You Need?
“Laser marking leather” can mean dark contrast, selective finish removal, shallow engraving or fine identification. Define the result first, because each target has a different failure mode and acceptance rule.
| Target effect | Typical material change | Common failure | Acceptance check |
|---|---|---|---|
| Colour change / darkening | Controlled heat changes the visible tone of the grain or dyed surface. | Brown halo, uneven shade, brittle or shiny patch. | Contrast uniformity across grain, colour lots and curvature. |
| Coating or finish removal | Removes paint, PU topcoat, foil or a thin protective layer to reveal contrast. | Patchy removal, exposed fibres, adhesion loss or mismatched undertone. | Layer consistency, edge definition and post-mark cleanability. |
| Shallow engraving | Removes a controlled amount of leather to create relief or texture. | Deep cut, fuzzy edge, dust, weak flex area or dimensional variation. | Depth/profile, tactile feel, flex and abrasion performance. |
| Fine code or logo | Uses a small heat-affected zone for text, serials or a 2D code. | Unreadable detail, bleed, cracking or code contrast drift. | Smallest feature, grade under production lighting and reject limit. |
How Shape, Thickness and Size Change the Marking Process
A setting that works on a flat swatch may fail on the finished part. Focus position, heat flow, part stability and the distance from seams or edges all change when the leather is thin, soft, curved or already assembled.
Flat sheets and flat panels
These are the easiest condition for establishing a repeatable process window because the marking plane is stable. Even so, test across representative grain, colour and coating variation rather than approving one ideal spot.
Curved or assembled parts
Surface-height variation can move parts of the artwork away from the intended focus, causing uneven contrast or line width. The final part may need a dedicated fixture, height control or a smaller controlled marking zone.
Soft and flexible leather
Material that sags, wrinkles or shifts can change both focus and registration. The fixture may need to support or flatten the marking area without leaving pressure marks on the visible surface.
Seams, folds and edge zones
Local thickness and height change near stitching, folded edges and laminated joints. These zones can mark differently from the central panel and should be included in the real-part trial if the artwork crosses them.
Thin skins and coated layers
Lower thermal mass and thin topcoats can make burn-through, gloss change, bubbling or delamination appear sooner. Use a conservative test matrix and verify the back side or underlying layer when damage would be unacceptable.
Large marking areas
A larger field is not only a size decision. Focus consistency, small-feature quality, heat accumulation and cycle time must still meet the acceptance rule across the full marked area.
Geometry changes machine configuration too: the accepted sample should be repeated on the actual part orientation before fixing the lens/field, working distance, fixture, table or height-control approach.
Which Laser Route Should You Test First?
Start with a representative part and define what “good” means. A clean-looking coupon is not production approval.
- Leather identity: full-grain, top-grain, split, bonded, PU, PVC or unknown composite.
- Surface stack: dye, paint, topcoat, waterproofing, embossing, foil, backing and adhesive.
- Moisture and batch: tanning lot, conditioning, humidity and supplier variation.
- Target mark: artwork, code size, colour, depth, hand feel and cosmetic limit.
- Durability: flex, rub, wash, solvent, sweat, UV or downstream finishing exposure.
Conditional source directions
CO₂ is commonly screened first for many organic leather surfaces because the wavelength couples well with organic material. It is a starting direction, not a guarantee.
| Condition | First comparison | Watch for |
|---|---|---|
| Natural, uncoated hide | CO₂ low-to-moderate heat matrix | Scorch spread, odour, fibre damage |
| Painted or PU-coated hide | CO₂ coating-removal matrix | Patchiness, bubbling, exposed base |
| Fine detail / heat-sensitive finish | Compare CO₂ with UV on samples when the finish is heat-sensitive; consider fiber/MOPA only if the identified coating or surface has already shown a suitable response in controlled trials | Bleed, gloss change, weak contrast |
| Unknown synthetic or mixed material | Identify construction and review SDS / supplier composition before laser testing | PVC or halogenated content, unexpected fumes, melting, fire risk |
Source selection remains conditional on the supplied grade, finish, target effect and safety review.
Change One Process Variable at a Time
A reproducible trial records the actual source wavelength and machine, pulse behaviour where adjustable, average power, speed, frequency, focus or controlled defocus, lens/spot condition, passes and extraction setup. Do not transfer settings between leather grades without retesting.
| Variable group | Compare and record | Observe | Release check |
|---|---|---|---|
| Source and pulse | CO₂ first where appropriate; compare UV when a heat-sensitive coating or fine-detail target justifies it. Consider fiber/MOPA only for an identified surface that demonstrates a suitable response in controlled trials. Record wavelength, pulse mode and frequency. | Absorption response, melting, coating removal, colour shift and cycle time. | Choose by accepted result, not by source label. |
| Energy and motion | Average power, scan speed, line spacing, passes and marking order. | Scorch halo, depth, residue, odour, edge definition and heat accumulation. | Use the lowest stable input that meets the defined effect and cycle target. |
| Optics and focus | Lens, working distance, spot condition, nominal focus and controlled defocus. | Small-feature quality, heat spread, uneven marks across curvature and local burn-through. | Verify across the entire marked area and real part geometry. |
| Durability | Conditioned sample plus required flex, rub, cleaning, sweat, solvent or UV exposure. | Contrast loss, cracking, delamination, exposed fibres and changed hand feel. | Approve against written cosmetic and functional reject limits. |
Common Leather Laser Marking Failures — and What to Check First
Most failed leather marks are not solved by simply adding power. The symptom usually points back to material construction, heat input, focus, extraction or the durability requirement.
| Failure mode | Likely contributors | First checks |
|---|---|---|
| Wide scorch or brown halo | Too much heat, slow motion, repeated passes or heat accumulation. | Reduce thermal input, compare speed/pass combinations and inspect the surrounding grain. |
| Uneven colour or patchy contrast | Grain, dye, moisture, finish or batch variation; uneven focus on curved parts. | Test multiple positions and lots, then confirm focus across the real geometry. |
| Bubbling, gloss change or melting | Polymer topcoat or synthetic surface reacting before the base material. | Confirm the coating/polymer and compare a lower-heat process window. |
| Exposed fibres or over-engraving | Finish removal or engraving depth exceeds the intended surface effect. | Reduce passes/energy and inspect depth, edge condition and hand feel. |
| Cracking or delamination after bending | Heat damage, weakened coating or adhesive/layer failure. | Run flex and abrasion checks on the marked production construction. |
| Strong odour, smoke or condensate | Material decomposition plus inadequate plume capture or filtration. | Stop if material identity is uncertain; review composition and verify extraction at the mark. |
| Residue on the part | Plume redeposition, char or coating decomposition. | Check airflow, cleaning method and whether the residue changes cosmetic acceptance. |
| Unreadable small text or code | Heat spread, coarse grain, insufficient contrast, poor focus or feature size below the stable process capability. | Test the actual smallest feature and verify readability under the intended reader/lighting condition. |
Screen the Material Before You Tune the Mark
The first safety question is not the laser power; it is what the leather, coating, backing and adhesive actually contain. Material screening and laser-system safety are separate checks.
Confirmed PVC or other unsuitable halogenated construction
Do not send confirmed PVC-containing synthetic leather through a routine laser-marking trial. Review the supplier material declaration/SDS and the site safety requirements instead. If the composition is uncertain, identify it before testing.
Unknown coatings, adhesives or treated leather
Hold the trial when the surface treatment, backing, adhesive, flame-retardant additive or restricted substance is unknown. Supplier documentation should be reviewed before exposure to laser heat.
Smoke, odour and fire control
Use suitable enclosure airflow and extraction, verify plume capture at the mark and inspect for glowing edges, char or deposited residue after the trial. Combustible material and extraction deposits require a defined fire-control procedure.
Laser radiation and machine safety
The enclosure, access control, interlocks, viewing protection and maintenance procedure must match the actual wavelength and complete machine design. Material suitability does not by itself establish a laser safety classification.
Boundary: this material guide does not certify emissions, assign a regulatory laser class, define PPE for an unknown system or replace the material supplier’s SDS and the site risk assessment.
Send the Real Leather Condition, Not a Generic Swatch
A useful recommendation needs the production-representative part, artwork and acceptance rule. One sample represents one grade, finish, batch and process state.
- Material: genuine, PU-based synthetic, confirmed PVC-containing or other composite construction; include grade, supplier and lot.
- Surface: tanning, dye, paint, topcoat, waterproofing, foil, backing and adhesive.
- Files: attach clear material/part photos, the artwork or code file, a drawing where geometry matters, and the SDS or supplier composition information for synthetic, coated or unknown constructions.
- Geometry: thickness, curvature, seam, edge distance, marked-area size, smallest feature and fixture reference.
- Acceptance: target colour/depth, code readability, edge, hand feel, odour limit, residue and cosmetic reject definition.
- Durability: flex, abrasion, wash, solvent, sweat, UV or downstream finishing.
- Production: quantity, cycle target, loading, vision, rotary, extraction and data interface.
Choose the right inquiry route: use Request a Quote for a standard machine and material review. Use OEM & Custom Inquiry when the project requires a dedicated fixture, vision, rotary handling, multi-height marking, data integration or automated loading.
From an Accepted Sample to the Final Machine Configuration
The machine should be configured from the accepted result and production conditions, not from the word “leather” alone. The test establishes the process route; the real part and production target then determine optics, work area, fixture, extraction and handling.
| Confirmed input from the sample | Configuration decision it informs | What still needs production confirmation |
|---|---|---|
| Accepted wavelength and mark mechanism | CO₂, UV or another validated source direction. | Repeatability on the real material lot and finished-part condition. |
| Stable process window and required cycle target | Practical source power/configuration and production margin. | Full cycle time including loading, positioning, marking and unloading. |
| Smallest feature and total marking area | Lens/field size and the spot-size versus coverage trade-off. | Quality at the edge of the field and under actual production focus control. |
| Part flatness, curvature and height variation | Working distance, fixture, table arrangement and any required height-control strategy. | Repeatable focus and registration on every part orientation. |
| Soft or flexible material behaviour | Support, clamping or flattening method that does not damage the visible surface. | Operator loading consistency and cosmetic contact marks. |
| Smoke, odour and residue | Enclosure, extraction and filtration direction. | Plume capture, maintenance load and site exhaust requirements. |
| Production quantity and loading method | Manual station, dedicated fixture, vision, conveyor or project-based automation review. | Actual takt/cycle requirement, data flow, reject handling and operator workflow. |
RFQ rule: once the material is accepted and these configuration inputs are agreed, quote the machine against the actual application. Do not select power, lens, work area or automation level from material name alone.
Leather Laser Marking FAQs
Can a CO₂ laser mark genuine leather?
Many genuine leather grades can be evaluated with CO₂, but tanning, dye, finish, thickness and target effect determine the useful process window. Test production-representative leather before choosing a configuration.
Why does leather burn, smell or turn brown?
Localized heat can carbonise fibres, change dyes or decompose a finish. Excess energy, slow speed, repeated passes or poor extraction can increase scorch halo, odour and residue.
Can one setting mark every black leather?
No. Colour, grain, tanning, topcoat and polymer chemistry vary widely. Keep an accepted setting record for each material and finish variant.
Can synthetic leather be laser marked safely?
Only after the polymer construction is identified. PU-based synthetic leather can be evaluated conditionally, while confirmed PVC-containing material should not enter a routine laser trial. For unknown constructions, review the SDS or supplier composition information before testing.
Will a mark survive bending and rubbing?
Not automatically. Flex, abrasion, sweat, wash and solvent exposure can change contrast or open a damaged edge. Include the real durability test in acceptance.
Does this page cover cutting leather?
No. This page covers material response to marking, shallow engraving and finish removal. Cutting and perforation require a separate process, safety and application review.
Send the Exact Leather Grade Before Choosing the Laser Route
Include the genuine/synthetic construction, tanning or polymer information, surface stack, thickness, photos, artwork, marked-area size, smallest feature, target colour or depth, odour and durability limits, production geometry and extraction constraints. After material screening rules out unsuitable constructions such as confirmed PVC, Zhuorui Laser can evaluate an appropriate sample route and then configure the machine around the accepted result.
Request a QuoteOEM & Custom InquiryContact Us