
Stainless Steel Laser Marking
Stainless steel can produce permanent, high-contrast laser marks, but the correct process depends on grade, surface finish, mark depth, corrosion requirement and how the mark will be inspected after production.
Is stainless steel a good fit for laser marking?
For most stainless steel parts, yes. Fiber laser marking is commonly used for permanent serial numbers, QR codes, Data Matrix codes, logos, scales, nameplates and traceability marks.
The practical question is not only whether stainless steel can be marked, but what result is acceptable on the exact surface: black contrast, shallow etching, deeper engraving, coating removal, scanner readability or corrosion-tested identification.
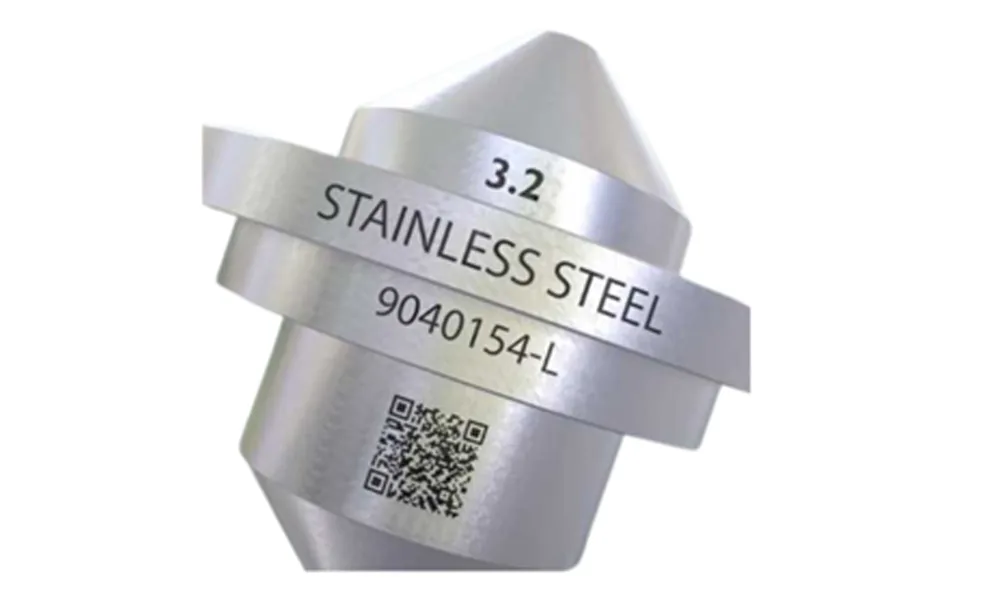
What can a laser do to the stainless surface?
Different stainless steel marking results come from different interactions with the surface. They should be selected by the required appearance, durability and downstream cleaning or corrosion tests.
Dark Annealed Marks
A dark mark can be created by controlled heat input on the stainless surface. It is often preferred when the user wants contrast without obvious material removal.
Validate: blackness, heat tint, cleaning resistance, passivation and corrosion exposure.
Surface Etching
Etching removes a small amount of material to create a visible permanent mark. It can be useful for logos, serial numbers and code marks that need a tactile or lighter engraved effect.
Validate: edge quality, burr-free feel, depth consistency and readability.
Deeper Engraving
Deeper engraving is possible, but it increases heat input and processing time. It should be chosen only when the mark must survive wear, repainting or harsh handling.
Validate: depth, cycle time, surface distortion and whether corrosion resistance remains acceptable.
Color Marking
On suitable stainless surfaces, controlled pulse and heat input can create visible color effects without using ink. This is a specialized appearance-driven route rather than the default choice for industrial identification.
Validate: color consistency, viewing angle, surface finish, cleaning response and repeatability across the real production part.
Why stainless steel grade and surface finish change the marking result
Stainless steel gets much of its corrosion resistance from a chromium-rich passive surface condition. Laser marking can modify that surface through controlled heating, oxide formation or material removal, so the best-looking mark is not automatically the correct process for every part. Alloy family, finish and surface treatment also change how contrast is seen and what must be checked after marking. The useful question is not only “Can it be marked?” but “What result is acceptable on this exact surface?”
| Material / surface condition | Why it matters | What to validate |
|---|---|---|
| 304 / 304L | A common austenitic stainless family and a practical starting point for dark marks, surface etching and engraved identification. | Contrast, surface feel, code readability, cleaning resistance and any corrosion requirement. |
| 316 / 316L | Often selected where corrosion resistance, hygienic cleaning or demanding service conditions matter, so appearance alone is not enough to approve the mark. | Final cleaning or sterilization sequence, passivation condition, corrosion test and readability after treatment. |
| 410 / 420 and other martensitic grades | Composition, hardness and heat treatment differ from common 300-series grades, so a parameter set proven on 304 should not be assumed to transfer unchanged. | Contrast, heat tint, edge quality, depth, distortion and corrosion behavior required by the part. |
| 17-4 / precipitation-hardening grades | These grades can require a different process window from common 300-series stainless, especially when a dark mark must survive downstream treatment. | Mark appearance before and after passivation, cleaning or the user’s specified corrosion test. |
| Brushed / satin | The directional texture changes reflected light and can make the same laser mark look different when viewed or scanned across the grain. | Contrast at the real viewing angle, code grading and whether the mark interrupts the required cosmetic grain. |
| Polished / mirror | High reflectivity and glare can reduce apparent contrast even when the laser interaction itself is stable. | Visual contrast under production lighting, scanner readability and cosmetic acceptance. |
| Bead-blasted / matte | A diffuse surface changes how light is scattered, so dark and light marks can appear different from the same mark on polished stainless. | Contrast, texture change, edge definition and consistency across the real blasted finish. |
Separate the stainless substrate from the surface layer before choosing the process
Bare stainless, passivated stainless and painted or powder-coated stainless should not be treated as the same marking task. The laser may be modifying the metal itself, working within a corrosion-sensitive surface condition, or mainly removing a coating to expose the substrate.
Bare Stainless Steel
The laser interacts directly with the stainless substrate. Dark surface marking, shallow etching and deeper engraving can all be evaluated, but the acceptable route depends on whether material removal, heat tint and surface texture are allowed.
Validate: contrast, tactile change, depth, heat-affected appearance and the required durability test.
Passivated or Corrosion-Sensitive Stainless
When corrosion performance matters, a visually good mark is only the first check. Material removal, oxide condition, heat input, cleaning and any post-mark passivation step can change the final surface condition.
Validate: the marked part after the real cleaning/passivation sequence and the customer’s specified corrosion or sterilization test.
Painted or Powder-Coated Stainless
The marking task may primarily be coating removal rather than direct marking of bare stainless. Coating chemistry, thickness and the required exposed-metal appearance become separate variables from the stainless grade underneath.
Validate: clean coating removal, substrate damage, edge definition, fumes/residue and final contrast.
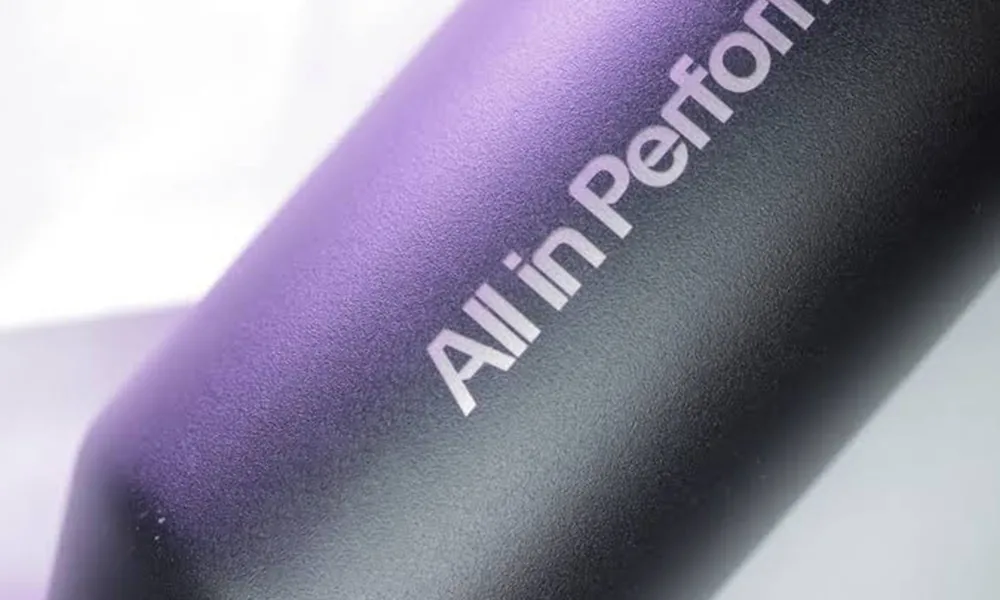
Why coated stainless needs a separate test
A clean exposed-metal result depends on the coating chemistry and thickness as well as the substrate underneath. Coated stainless is therefore a two-layer process problem, not simply another bare-stainless setting.
Standard fiber or MOPA fiber: what should be tested first?
For most bare stainless steel identification work, a pulsed fiber laser is the first route to evaluate. The next decision is not “Which machine is more advanced?” but whether the required mark needs ordinary engraving/etching performance or tighter pulse and heat-input control.
Standard Q-Switched Fiber
A standard pulsed fiber system is a practical starting point for many serial numbers, logos, QR/Data Matrix codes, shallow etching and engraved identifiers on stainless steel.
Choose this test route first when: the goal is a conventional permanent identifier and there is no special requirement for a narrow dark-mark or color process window.
MOPA Fiber
MOPA-style pulse control is worth testing when pulse width and heat input need finer adjustment to optimize a dark surface mark, reduce unwanted thermal effect, or develop controlled color effects on suitable stainless surfaces.
Do not treat MOPA as an automatic upgrade: if a standard fiber source already meets contrast, durability, cycle time and surface requirements, additional pulse-width flexibility may not add user value.
When to Evaluate Another Route
If the part has a difficult finish, strict corrosion/passivation requirements or a process window that cannot be qualified with the initial fiber trials, other sources such as UV or ultrashort-pulse systems can be evaluated as engineering alternatives.
Decision rule: change laser route because the acceptance test requires it, not because a different source sounds more advanced.
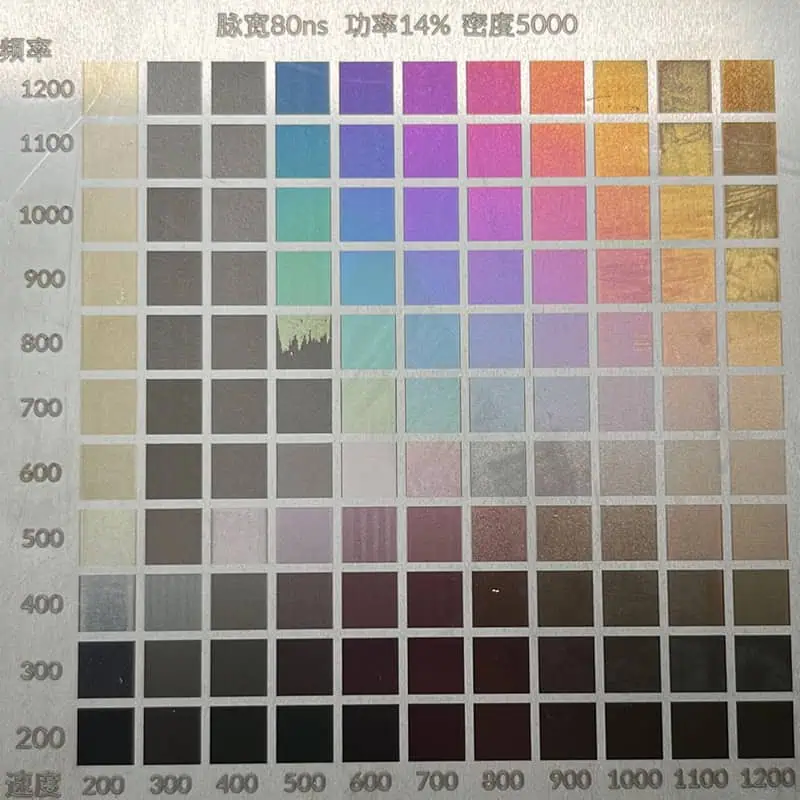
MOPA color and pulse-control process window
On suitable stainless surfaces, MOPA pulse-width control can be used to explore different heat-input windows for dark or colored surface effects. The value is not simply “more colors”; it is the ability to tune the interaction more precisely when the required appearance has a narrow process window.
How corrosion requirements change the marking strategy
Stainless steel depends on a passive chromium-rich surface condition for corrosion resistance. Laser marking can change that surface through heat, oxide formation or material removal, so the acceptable marking mechanism depends on the user’s corrosion and post-treatment requirements.
- If corrosion performance is critical: start by testing a low-removal, high-contrast marking route rather than assuming deep engraving is acceptable.
- If engraving depth is required: treat the removed material and exposed surface as an engineering trade-off that must be qualified against the part specification.
- If passivation happens after marking: validate both mark appearance and corrosion performance after the actual passivation process; post-treatment can change the visual result.
- If the part is cleaned, sterilized or chemically exposed: perform the relevant process before final visual or code-readability approval.
- If the requirement is only cosmetic: avoid importing medical or corrosion-critical restrictions that the part does not actually need.
What a useful sample test should prove
A sample test should answer more than “Did the laser make a mark?” It should confirm the required contrast or depth on the exact alloy and finish, then check the mark after the downstream process that matters to the customer.
- Visual contrast under real lighting
- Scanner / code readability, if applicable
- Surface feel and depth
- Cleaning, abrasion or sterilization resistance
- Passivation / corrosion acceptance where specified
Move from material testing to machine configuration when geometry or handling becomes the main constraint
- Compare machine families: Fiber Laser Marking Machines.
- Round parts or circumference marking: Rotary & Cylindrical Marking.
- Random part placement or camera alignment: Vision Positioning.
- Curved, stepped or height-varying surfaces: 3D Curved-Surface Marking.
- Production-data connection: Traceability Integration.
Where stainless steel marking requirements change in real applications
The material is the same family, but the acceptance criteria can be very different. Use the workpiece and its service conditions to decide what the mark must survive and which variables need sample validation.
| Workpiece | Typical mark | Main stainless-specific concern | Related application / solution |
|---|---|---|---|
| Medical or dental instruments | UDI, Data Matrix, serial number, logo | Passivation, sterilization, smooth cleanable surface, corrosion performance and readability after treatment. | Medical & Dental |
| Automotive stainless components | Serial number, Data Matrix, traceability code | Contrast, heat effect, abrasion, corrosion exposure and production readability. | Automotive & EV |
| Tools, nameplates and machine parts | Logo, part number, scale, permanent identifier | Wear resistance, engraving depth, surface finish and long-term readability. | Industrial Parts |
| Tumblers and coated stainless products | Logo, personalization, graphic mark | Whether the task is direct metal marking or coating removal, plus rotary handling and cosmetic edge quality. | Tumblers & Cups |
| Pipes, rings and cylindrical parts | Serial number, graduation, circumferential code | Surface result plus focus, rotation, fixture stability and readable coverage around the circumference. | Rotary Solution |
What to send before Zhuorui recommends a configuration
A stainless steel marking result should be confirmed on the real part. The more complete the sample information, the faster Zhuorui can test a useful parameter direction and report what the test actually proves.
Material
- Stainless grade, such as 304, 316, 410 or 420
- Surface finish: brushed, polished, bead-blasted or machined
- Coating, passivation, oil or cleaning process
Mark Goal
- Text, serial number, logo, QR code or Data Matrix
- Target contrast, depth or surface feel
- Barcode scanner and grading requirement, if any
Production
- Part size, marked area and geometry
- Annual quantity and cycle-time expectation
- Abrasion, solvent, sterilization or corrosion tests
Stainless steel laser marking questions
Can a laser make a black mark on stainless steel?
Often yes, but the final blackness depends on the stainless grade, finish, cleaning state and laser parameters. If the part has corrosion or passivation requirements, the black mark should be validated under the final cleaning or corrosion test.
Is fiber laser marking suitable for stainless steel?
Fiber laser marking is usually the first choice for stainless steel. Standard fiber systems can handle many serial numbers, logos and etched marks, while MOPA-style pulse control may be evaluated for finer heat control or darker marks.
Will laser marking damage stainless steel corrosion resistance?
It can if the process creates an unacceptable surface change for the user’s environment. For corrosion-sensitive parts, test the actual marked sample after cleaning, passivation or the user’s required durability test.
Does 304 stainless steel mark differently from 316 stainless steel?
Both can be laser marked, but the same parameter window should not be assumed to transfer unchanged between grades, finishes and post-treatment conditions. For corrosion-sensitive parts, validate the actual grade after the required cleaning, passivation or durability process.
Send stainless steel sample details for parameter testing
Share your stainless grade, finish, mark content, contrast or depth target, part geometry and required durability test. Zhuorui can evaluate the material response and recommend the correct machine or solution route.