
Jewelry Application Guidance
Bracelet and Bangle Laser Engraving
Plan bracelet and bangle laser engraving around the actual piece, target result and production method. Product type, alloy and finish, inside- or outside-band location, curvature, clamping, mark content and acceptance criteria determine what should be tested first and which laser, lens, rotary, fixture or positioning configuration is justified.
Product Scope
Which bracelet and bangle products does this guidance cover?
The first decision is not simply “gold or silver.” The product form, band width, curvature and mark location determine whether the job behaves like a simple localized mark, a circumferential rotary task or a difficult inside-band application.
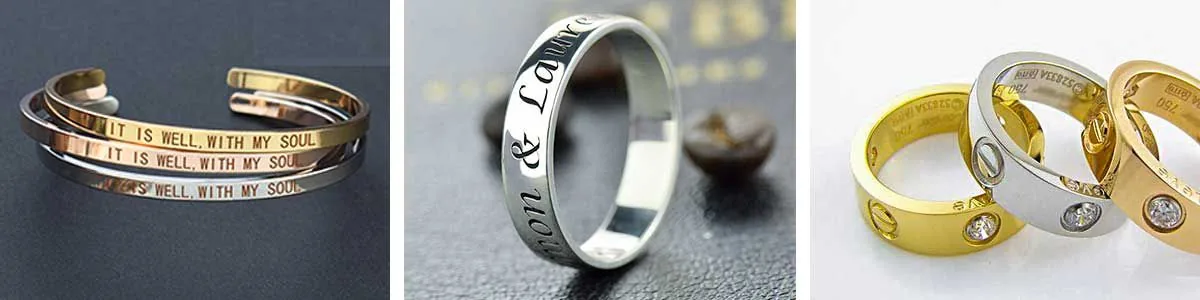
This page is for rigid bangles, open cuff bracelets, hinged or structured bracelets, wide or narrow metal bands and other curved jewelry pieces where the mark is placed directly on the bracelet body. Chain bracelets with a separate flat plate or tag can be simpler because the marking surface may behave more like a flat jewelry part.
Use the geometry category that best matches the real part before discussing machine configuration. A rigid circular band may need a mandrel or rotary setup; an open cuff may be sensitive to clamping pressure; a wide curved band may create more focus-height variation; and an inside-band mark can be limited by optical access and fixture clearance.
Rigid Bangles
Closed circular bands usually need repeatable support on a mandrel, nest or rotary fixture when angular position or circumferential marking matters.
Cuff Bracelets
Open forms can be easier to access but may deform under clamping, so holding pressure and geometry change should be checked during testing.
Wide Curved Bands
Greater surface width and curvature can create focus-height variation across the mark area and may require a smaller marking zone, rotary motion or a different focus strategy.
Internal Personalization
Inside-band names, dates, symbols or identifiers need enough optical access, fixture clearance and stable focus before a machine configuration can be locked.
Purpose & Mark Content
Why are bracelets and bangles laser marked?
The reason for marking determines how the result should be judged. Personalization, brand identification, traceability and decorative work do not share the same acceptance criteria.
Brand Identification
Maker marks, workshop identifiers and brand symbols help identify the producer or product line and usually require consistent placement and clean detail.
Customer Personalization
Names, initials, dates and short messages create one-off or small-batch customization where artwork accuracy and preventing data mistakes can matter as much as marking speed.
Product Identification
Serial numbers, batch identifiers or data marks may support inventory or traceability workflows when the jewelry producer needs item-level or batch-level identification.
Decorative Customization
Patterns, fine linework and surface details use the laser as a controlled design process, so visual consistency and acceptable surface effect become the main criteria.
What Is Usually Marked
What content is commonly engraved on a bracelet or bangle?
Define the actual mark content and size early because artwork detail, field size, stroke width and data handling can change the practical setup.
Logos and Maker Marks
Small logos, workshop symbols and brand marks that need readable edges and repeatable orientation.
Names, Initials and Dates
Variable personalization content that may change for every piece and therefore needs controlled data entry and positioning.
Serials and Data Marks
Serial numbers, batch codes and QR/data marks where size, readability and verification need to be defined before production.
Patterns and Fine Detail
Decorative lines, motifs and micro details where focus, field choice and surface response determine whether the intended visual quality is achievable.
Result Variables
What determines the laser marking result on a bracelet or bangle?
Material name alone is not enough to choose a laser or predict the finish. The result comes from the combination of substrate, surface, geometry, artwork, process window and positioning stability.
Alloy and Substrate
Gold, silver and other metals can respond differently by alloy composition and condition. Use representative production material for testing rather than assuming one result applies to every jewelry alloy.
Finish and Coating
Polished, brushed, plated, coated, oxidized or textured surfaces can change contrast, heat response, visible texture and the amount of surrounding surface change.
Curvature and Mark Location
Diameter, band width, inside versus outside placement and local curvature affect focus, beam access, fixture clearance and whether rotary or 3D support should be evaluated.
Mark Size and Detail
Text height, stroke width, logo detail, code cell size and total marking area affect practical readability, field choice and the process window that must be tested.
Laser and Process Window
Source type, power range, pulse behavior, lens, focus and marking parameters interact with the target effect. Higher power by itself does not guarantee a better or faster result.
Fixture and Motion Stability
Clamping repeatability, rotary alignment, part runout and loading consistency determine whether a good sample can be reproduced across multiple pieces.
Gold Laser Marking
Use this guide for gold-specific alloy, surface-condition and material-response considerations before sample testing.

Silver Laser Marking
Use this guide for silver-specific reflectivity, surface response and sample-test considerations.
Target Result
What marking result should you target?
A sample cannot be accepted until the buyer defines what “good” means. Separate appearance, surface effect, placement, readability and durability requirements instead of using a vague target such as “clear engraving.”
Visual Appearance
Define the required contrast, edge cleanliness, decorative consistency and whether the mark should be subtle or visually prominent on the finished surface.
Depth and Surface Change
State whether the target is a shallow visible mark, deeper engraving or minimal surrounding surface change. These targets may require different process windows.
Placement and Orientation
Set acceptable position, centering, angle and repeatability for inside-band, outside-band or circumferential marks.
Readability
For small text, serials or data marks, define the minimum readable size and whether machine verification or code scanning is required.
Durability
If handling, cleaning or wear resistance matters, define the relevant post-mark condition that the sample must survive instead of assuming permanence from appearance alone.
Cycle-Time Target
Set a realistic production target using loading, positioning, marking, unloading and inspection time rather than treating scan speed as the full cycle time.
Geometry, Access & Holding
How do curvature, mark location and fixturing affect the setup?
This section is about physical access and repeatable positioning. Production data flow, inspection and reject handling are addressed separately in the production workflow.
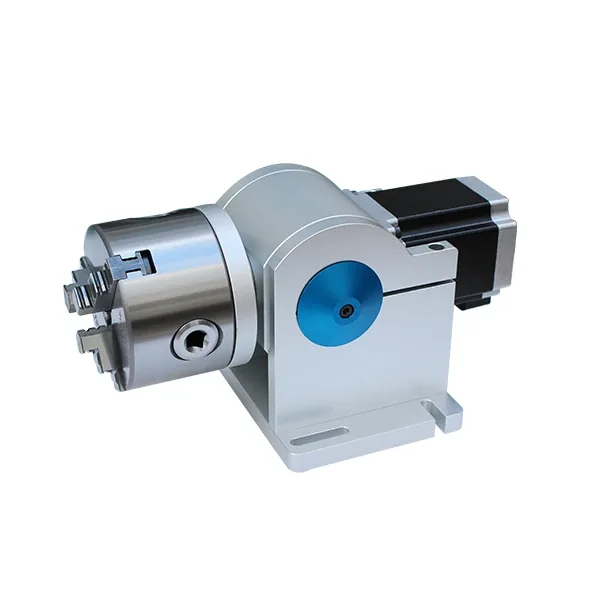
A localized mark on a stable outside surface may only need a repeatable fixture. A mark that follows the circumference may need rotary motion. Inside-band marking adds beam-access, focus and fixture-clearance constraints, while wide curved bands can create more focus-height variation across the marking area.
The fixture must locate the part without creating unacceptable scratches, deformation or slip. The test should therefore evaluate not only whether the laser can create the mark, but also whether the same position and orientation can be reproduced across representative pieces.
- Outside band: check mark angle, local curvature, rotary alignment and diameter range.
- Inside band: confirm optical access, focus, fixture clearance and the usable marking field.
- Open cuff: check whether clamping pressure changes the geometry or finish.
- Rigid bangle: evaluate mandrels, nests or repeatable locating features for batch consistency.
- Variable sizes: determine whether one adjustable fixture is sufficient or whether multiple nests are more repeatable.
Laser Route
Which laser route should be tested first?
Choose the first test route from the actual metal, finish and target result. Rotary, fixtures, vision and 3D focus control are configuration functions, not substitutes for selecting the correct laser process.
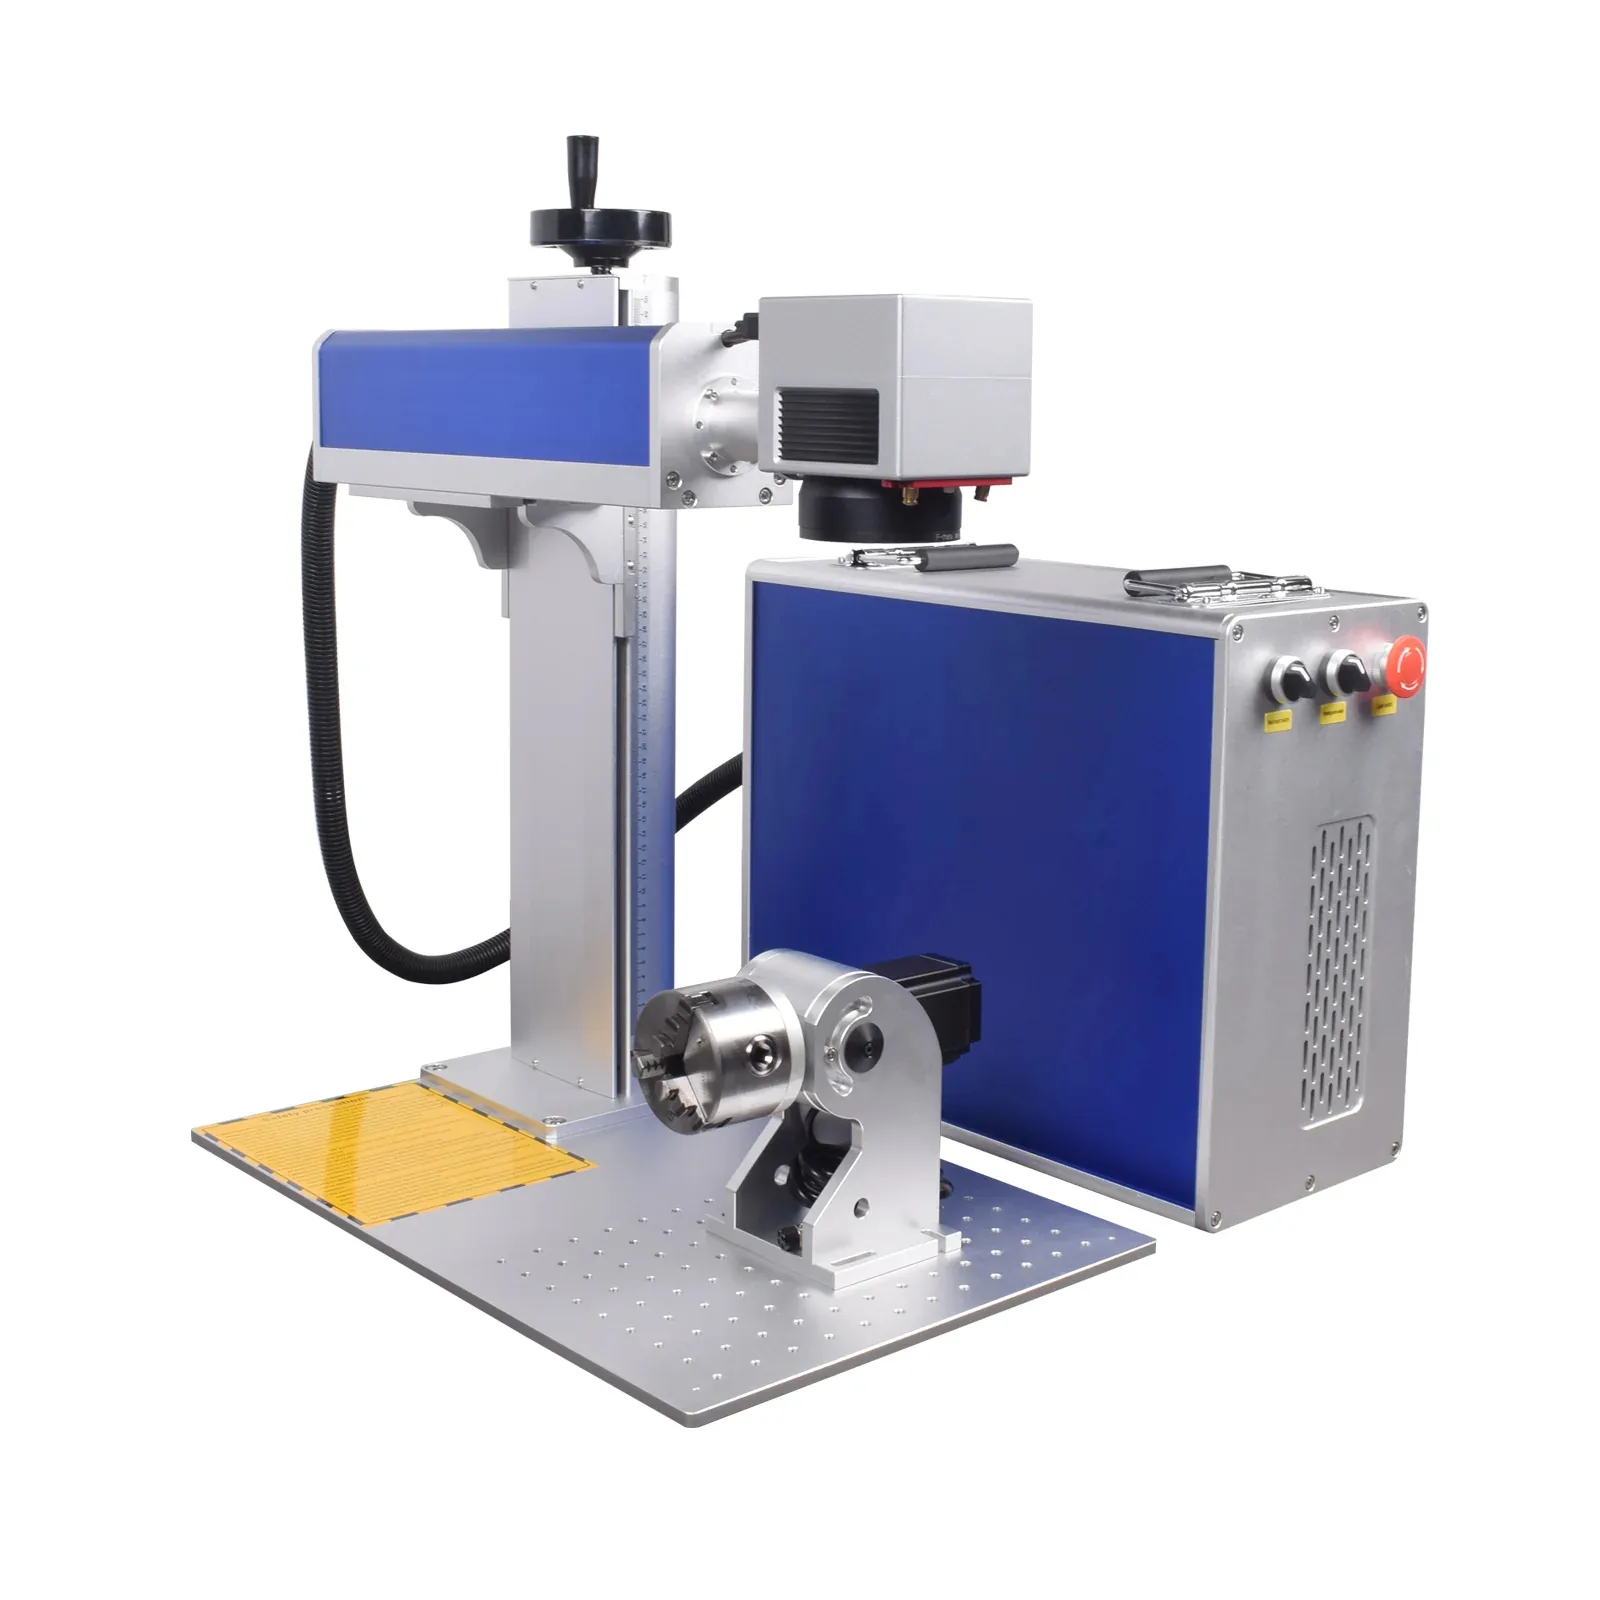
For many metal bracelet and bangle marking tasks, a fiber laser marking platform is a practical first evaluation direction. Q-switched fiber and MOPA fiber can both be relevant, but the choice should follow sample results, the required surface effect and the useful process window rather than source name alone.
If the mark must follow the circumference, test the laser process together with rotary motion because motion accuracy and workpiece runout affect the visible result. If ordinary 2D focus cannot accommodate the required height variation, a 3D curved-surface configuration can be evaluated. Vision should only be added when recognition or placement variation is a real workflow problem.
- Start with the required result: appearance, depth, readability, surface change and cycle-time target.
- Test fiber first where appropriate: compare Q-switched and MOPA only when the application benefits from the difference.
- Add rotary for motion needs: circumferential marking and angular positioning, not simply because the part is round.
- Add 3D only for focus-height needs: when curvature or height variation cannot be handled reliably by the simpler setup.
- Add vision for positioning needs: identification and location variation, not as a cure for focus or curvature problems.
Failure Modes
What commonly goes wrong when laser marking bracelets and bangles?
Most failures are not caused by one parameter alone. Use the visible defect to trace back to focus, motion, holding, artwork, surface condition or process-window problems before changing the machine specification.
Uneven Mark Around the Curve
Check focus-height variation, rotary alignment, part runout and whether the marking area exceeds what the current 2D setup can hold consistently.
Position Shifts Between Pieces
Review fixture locating features, diameter variation, inconsistent loading and whether the part can rotate or slide before the mark starts.
Rotary Slip or Distorted Artwork
Insufficient grip, poor mandrel fit or incorrect motion setup can stretch, overlap or misalign text and patterns around the circumference.
Fixture Marks the Jewelry
Hard contact surfaces, excessive clamping pressure or an unsuitable nest can scratch polished finishes or deform open bracelets.
Inside-Band Focus or Access Failure
The fixture, optical path or local curvature may prevent the laser from reaching the intended area with stable focus across the whole mark.
Fine Detail Becomes Unreadable
Review artwork size, stroke width, lens/field choice, focus and process settings before assuming that more laser power will solve the problem.
Handling & Production Workflow
How does bracelet and bangle marking move into production?
A production-ready setup must control loading, position, data, marking, verification and reject handling. The laser exposure is only one part of the full cycle.
Load and Identify the Part
Confirm bracelet type, size, finish and the correct work order or personalization record before clamping.
Locate and Clamp
Use the defined fixture, nest or rotary setup so orientation and mark position are repeatable without damaging the jewelry surface.
Load Artwork or Variable Data
Control names, dates, serials or other variable content so the correct file is matched to the correct part before marking.
Mark
Run the approved recipe and motion sequence that was established during sample validation for the relevant material, finish and geometry.
Verify and Accept
Inspect appearance, position and readability; scan data marks when required by the workflow; then record acceptance if traceability is needed.
Reject, Rework or Release
Define what happens when a mark is wrong, unreadable or misplaced. Jewelry that cannot be safely reworked should be separated before downstream packing or cleaning.
Sample Acceptance
How should a bracelet or bangle sample be accepted?
Sample testing should produce a pass/fail decision against the buyer’s actual target, not just one visually attractive demonstration piece.
| Acceptance Check | What to Review | Why It Matters |
|---|---|---|
| Correct content | Logo, name, date, serial, code or pattern matches the approved file. | Prevents artwork and variable-data errors from being mistaken for laser-process problems. |
| Position and orientation | Mark is centered/aligned at the required inside, outside or circumferential location. | Confirms fixture, rotary and loading repeatability. |
| Appearance and surface effect | Contrast, edge quality, depth and surrounding surface change meet the stated target. | Confirms whether the selected laser route and process window are acceptable. |
| Fine-detail readability | Small text, symbols or data marks remain readable at the real production size. | Confirms artwork, lens/field and focus are suitable. |
| Fixture impact | No unacceptable scratch, dent, deformation or clamping mark is introduced. | Confirms the holding method is production-safe for the finished jewelry. |
| Repeatability | Several representative pieces meet the same position and quality criteria. | Separates a one-off good sample from a repeatable production process. |
| Verification / durability where required | Scan codes, inspect after relevant cleaning/handling, or apply the buyer’s defined check. | Confirms functional requirements beyond initial visual appearance. |
| Full cycle time | Measure loading, positioning, marking, unloading and inspection together. | Shows whether the real bottleneck is laser processing, fixture handling or verification. |
Test Result → Machine Configuration
How do sample-test results determine the final machine configuration?
The final machine should be the simplest configuration that repeatedly meets the accepted result and workflow. Add source, motion, positioning or automation functions only when the test shows a real requirement.
| Sample-Test Finding | Configuration Consequence | What It Resolves |
|---|---|---|
| Localized mark passes without rotation | Standard fiber workstation plus a suitable fixture may be sufficient. | Avoids adding rotary hardware when motion is not required. |
| Mark must follow the circumference | Add a compatible rotary axis and mandrel or fixture. | Controls angular motion and wrap-around placement. |
| Part diameter or shape varies | Use an adjustable fixture, multiple dedicated nests or another repeatable holding strategy. | Controls loading and positioning variation. |
| Inside-band access is limited | Redesign fixture/access geometry before locking the workstation. | Prevents a machine purchase that cannot physically reach the mark area. |
| 2D focus cannot hold the required curved area | Evaluate a 3D curved-surface marking configuration. | Addresses focus-height variation rather than a positioning problem. |
| Standard fiber route meets the accepted target | Keep the simpler approved fiber source and process window. | Avoids unnecessary source complexity or cost. |
| MOPA provides a materially better accepted process window | Select the MOPA fiber configuration justified by the sample result. | Links source choice to the required surface effect and process stability. |
| Small detail needs a tighter usable field | Select lens/field size from the accepted mark size and working geometry. | Balances usable marking area with detail requirements. |
| Placement variation causes rejects | Improve locating features first; evaluate vision positioning when recognition or part-location variation remains a real problem. | Uses vision for identification/positioning rather than focus correction. |
| Variable personalization creates data risk | Add the required software/data workflow, template control or verification step. | Reduces wrong-name, wrong-serial or wrong-file errors. |
| Accepted mark quality is repeatable, but laser processing time still misses the required cycle-time target with sufficient process margin | Evaluate the appropriate source and power range, then recheck surface effect, heat input, process stability and full cycle time on representative parts. | Makes power range a test-derived configuration decision instead of a preselected specification. |
| Loading or inspection dominates cycle time | Improve fixture, multi-part handling or workflow before increasing laser power. | Targets the actual production bottleneck. |
RFQ Preparation
What should you send for bracelet and bangle sample testing?
The RFQ should carry forward the decisions above. The more clearly the real workpiece, target result and workflow are defined, the easier it is to plan a useful sample test and avoid unnecessary machine options.
Workpiece and Surface
Bracelet type, dimensions, diameter range, material/alloy if known, surface finish, curvature and photos or representative samples.
Mark Content and Location
Logo, text, name, date, hallmark-style symbol, serial or data mark, with artwork, target size and exact inside/outside/circumferential position.
Target Result
Required appearance, contrast or depth, acceptable surrounding surface change, placement tolerance, readability and any relevant durability check.
Production and Loading
One-off personalization, small batch or repeated production; expected quantity; how the part will be loaded; and whether diameter/finish variation is expected.
Data and Verification
State whether content changes per piece, whether codes must be scanned, and how the operator should confirm correct data before release.
Acceptance Standard
Define what makes the sample pass: appearance, position, repeatability, fixture impact, readability, cycle time and any downstream handling requirement.
FAQ
Bracelet and bangle laser engraving FAQ
Can a laser mark bracelets and bangles?
Yes, many metal bracelet and bangle marking tasks can be evaluated with a fiber laser marking system. The useful process and final result depend on the actual alloy, finish, geometry, mark size and acceptance target.
Is a rotary axis required?
Not always. A localized mark may only need a stable fixture. Rotary support becomes relevant when the mark follows the circumference or when controlled angular motion is required.
Can the machine mark inside a curved bracelet or bangle?
It may be possible, but inside-band marking should be tested for optical access, focus, usable field, fixture clearance and holding stability before the system is finalized.
Can open bracelets and rigid bangles use the same fixture?
Not necessarily. Open bracelets can deform under clamping, while rigid bangles may need more controlled locating or mandrel support. Fixture design should follow the actual geometry and finish sensitivity.
Should I choose MOPA fiber instead of standard fiber?
Do not decide from source name alone. Test the actual material, finish and target effect, then choose MOPA only when the accepted sample shows a meaningful process or result advantage for the application.
Can laser marking replace legal hallmarking approval?
Laser marking can create readable symbols or hallmark-style content, but the marking process itself does not constitute legal hallmarking approval.
What should pass during sample validation?
Define acceptance for correct content, position, appearance, surface effect, readability, fixture impact, repeatability and full cycle time. Add scanning or durability checks when the real workflow requires them.
How does the sample test affect the final machine?
The accepted result should determine the source and power range, lens/field, rotary or 3D requirements, fixture/mandrel, optional vision, data workflow and other workstation functions instead of selecting those options in advance.
Sample-Test Configuration Review
Use a representative bracelet or bangle sample to select the machine
Send the actual jewelry geometry, material and finish, mark artwork and location, target result, production quantity and acceptance criteria. Zhuorui can use those inputs to plan sample testing and evaluate the source, lens, rotary, fixture, positioning and workstation configuration.