
Silver Laser Marking
Silver can be laser marked, engraved and coded, but the result depends strongly on silver type, surface finish, tarnish condition, plating structure, part geometry and the required mark. A useful machine recommendation starts with the actual production part and a controlled sample test.
Yes—but “silver” alone is not enough to choose the process
Many silver parts can be laser marked, engraved or coded. The practical question is not only whether the laser can make a visible mark, but whether the final mark can meet the required contrast, depth, appearance, code readability and post-cleaning condition without unacceptable deformation or precious-metal loss.
Before selecting a source or power class, confirm the silver type, final surface, plating or coating, part thickness, mark content, target result and any polishing, cleaning, wear or electrical-contact requirements after marking.
Which silver type and surface condition are you marking?
Composition and surface condition are different variables. A 925 sterling part and a 999 fine-silver part should not automatically share one parameter assumption, and the same alloy can respond differently after polishing, tarnishing, coating or cleaning.
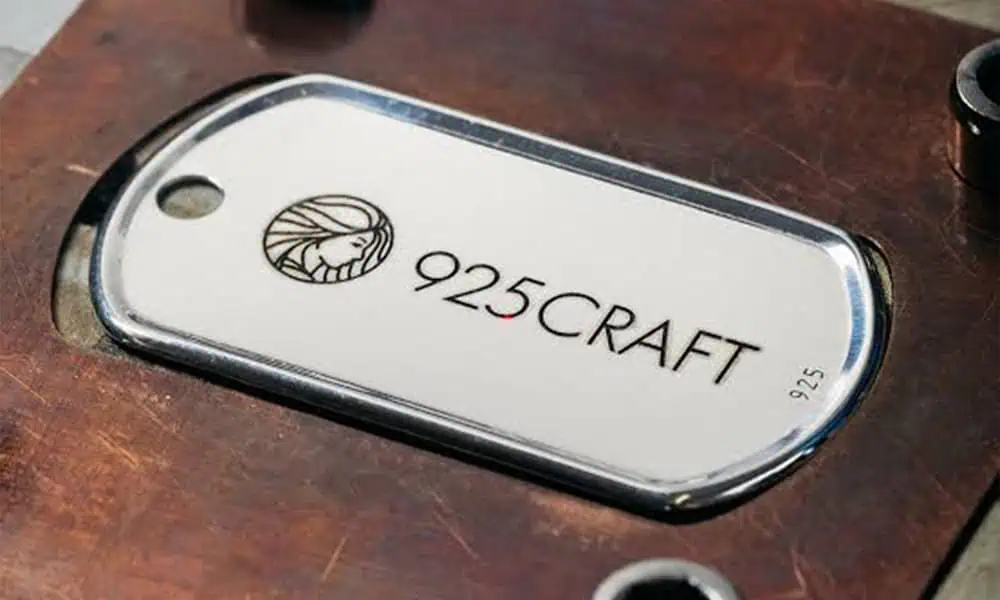
925 silver marking example
Useful for discussing contrast, identification and engraving on sterling silver. Final parameters still need approval on the actual finish and part geometry.
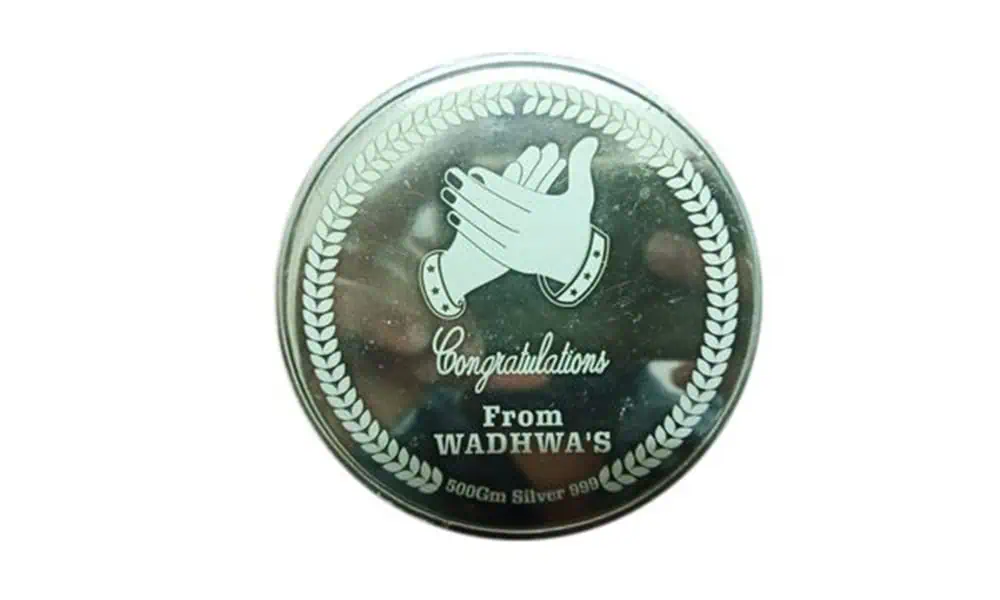
999 silver marking example
Fine silver is soft and value-sensitive, so the required appearance, engraving depth and material loss should be confirmed together.
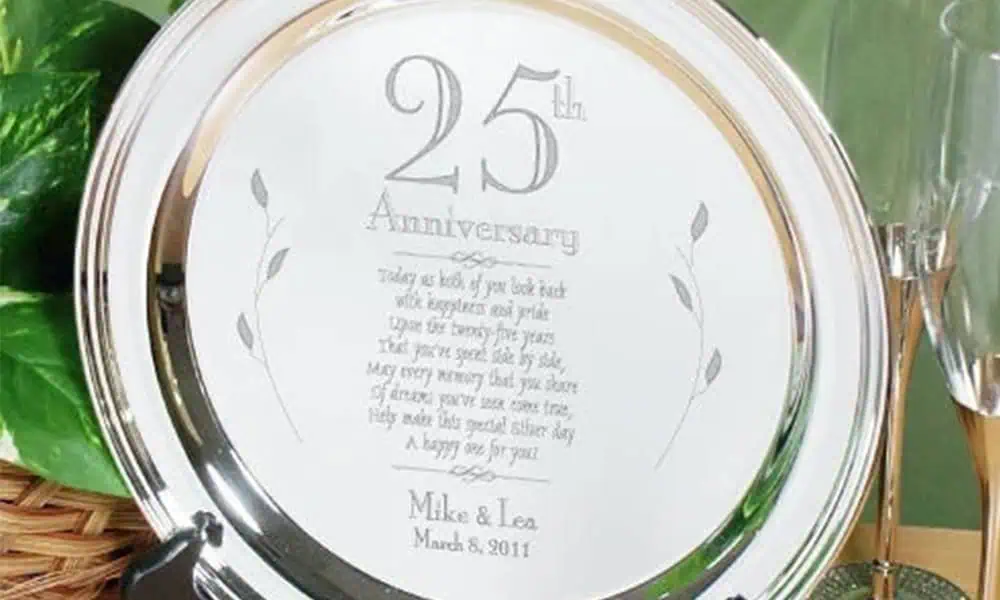
Silver-plated marking example
Plated parts need a separate process limit because excessive removal can expose the base metal or permanently change the surface appearance.
Silver type / fineness
Fine silver / 999 silver
High-silver-content material is relatively soft and can be sensitive to cosmetic change, engraving depth and material loss. Final finish and weight sensitivity should be defined before deeper marking.
Sterling silver / 925 silver
Alloying elements can change oxidation, color response and the practical process window. A result developed on fine silver should be revalidated on sterling silver.
Other silver alloys
If the exact composition is unknown, treat the material as an unknown alloy rather than assuming it behaves like 925 or 999 silver. Use the real part or a verified matching coupon for testing.
Silver-plated parts
Silver-plated parts are not the same process problem as solid silver. Plating thickness, base material and whether any substrate exposure is acceptable must be confirmed before material-removal marking.
Surface condition
Mirror polished
Bright polished surfaces are visually unforgiving. Small changes in contrast, heat tint, texture or edge quality can remain obvious after marking.
Brushed or matte
Existing texture can change how the mark is perceived. The same laser setting may look different on a brushed or matte finish than on a mirror-polished surface.
Tarnished or oxidized
Tarnish changes the surface chemistry and can make visual results less consistent. Cleaning state should be fixed before comparing laser samples.
Coated, lacquered or contaminated
Lacquer, oil, polishing compound and other surface layers can change contrast, residue and fume behavior. Confirm whether the laser is marking the silver itself or a surface layer.
Reflectivity, thermal conduction, softness and tarnish narrow the process window
Silver is not simply another generic metal. Its optical response, rapid heat spreading, soft surface and tendency to tarnish all influence how contrast, engraving depth and cosmetic quality develop.
High reflectivity
Bright silver surfaces can be difficult to couple with consistently, especially when the finish is highly polished. The same nominal setting can produce different visual results as finish and beam interaction change.
Fast heat spreading
Silver conducts heat efficiently, so simply increasing power does not guarantee a darker or deeper mark. Pulse strategy, dwell, pass count and spot interaction still need to be balanced against the target result.
Soft, value-sensitive material
Thin jewelry, premium silver parts and weight-sensitive products can show deformation, burr, edge damage or unwanted material loss if engraving is too aggressive.
Tarnish changes the surface
Freshly polished silver and tarnished silver should not be treated as the same starting surface. Cleaning state and post-mark exposure can change the final appearance and must be part of validation.
Where silver parts are used and why they are marked
Silver marking requirements differ because the product function differs. A decorative ring, an investment bar and a silver-plated electrical contact do not have the same acceptance criteria.
Jewelry & accessories
Rings, bracelets, pendants and other silver products may need personalization, logos, purity or identification information, decorative patterns and small serial marks. Cosmetic finish and post-polishing behavior are usually critical.
Coins, medals & collectibles
Typical needs include identification, limited-edition numbering, decorative graphics, logos and traceability. Surface appearance, repeatability and material-loss limits may matter more than maximum engraving depth.
Silver bars, plates & tags
These parts may carry serial numbers, weight or fineness information, brand identification and batch data. Mark depth and weight loss should be reviewed when value depends on material mass.
Silver-plated components
Decorative hardware, plated accessories and coated components need tight control of penetration depth so the base material is not unintentionally exposed.
Electrical & contact components
Silver or silver-plated contacts can require part numbers, batch traceability or production codes, while the actual electrical-contact area may need to remain unmarked.
Decorative silver products
Giftware, premium accessories and decorative components may use laser marking for logos, names, patterns or localized matte effects where appearance is the primary acceptance criterion.
What is usually marked on silver?
Mark content determines the required feature size, depth, contrast and verification method. Fine text, decorative artwork and machine-readable codes should not share one acceptance standard.
Identification
- Part number
- Model or batch number
- Serial number
- Date or production code
Purity / fineness information
- Purity or fineness information
- Material identification
- Traceability information
Brand & personalization
- Logo
- Name or initials
- Dates
- Custom artwork
Codes & decoration
- QR code
- Data Matrix
- Decorative patterns
- Matte or textured effects
Choose the required result before choosing the machine
A dark contrast mark, a shallow engraving, a deep engraving and a decorative matte texture are different process targets. They should not share one parameter set or one acceptance standard.
| Target result | Typical purpose | Main variables | What to validate |
|---|---|---|---|
| Dark contrast mark | Readable text, logo or identification without intentional deep removal. | Finish, tarnish state, cleaning, pulse control and viewing angle. | Contrast after cleaning, appearance under normal lighting and resistance to the expected handling process. |
| Shallow engraving | Permanent text, logo, serial number or decorative line. | Depth target, silver thickness, pass count, focus and workholding. | Depth, burr, deformation, edge quality, weight sensitivity and cycle time. |
| Deeper engraving | Applications where visible depth is required. | Material loss, thermal accumulation, depth uniformity and number of passes. | Measured depth, deformation, surface quality, acceptable weight loss and production time. |
| Fine text / QR / Data Matrix | Micro identification and machine-readable traceability. | Feature size, glare, focus stability, fixture repeatability and surface finish. | Final code size, scanner readability and repeatability on production parts. |
| Decorative texture | Matte, frosted or patterned cosmetic effects. | Surface finish, pulse strategy, cleaning and post-polish process. | Uniformity, approved appearance and stability after the actual finishing process. |
| Plated-layer mark | Identification or decoration on silver-plated components. | Plating thickness, base material, adhesion and required removal depth. | Whether the base metal is exposed, edge consistency, residue and downstream durability. |
Shape, thickness and marking area change the process
Silver material response is only one part of the decision. Curvature, thickness, marking area and fixture repeatability determine whether a standard flat-field setup is enough or whether rotary, 3D or vision functions should be evaluated.
| Part condition | What changes | Configuration to evaluate |
|---|---|---|
| Flat tags, bars, plates or coins | Marking field, fixture, focus and engraving-depth control. | Standard field and workholding sized to the actual mark area. |
| Rings, bangles or cylindrical parts | Curvature changes focal position and marking angle around the circumference. | Rotary & Cylindrical Marking |
| Curved pendants or shaped jewelry | Height variation can reduce focus consistency across the mark. | 3D Curved Surface Marking when height variation is meaningful. |
| Thin or delicate silver parts | Heat input, clamping force and material removal can cause distortion or cosmetic damage. | Low-stress fixture and conservative sample-validation route. |
| Large parts or large mark areas | Field size, feature size and optical trade-offs become more important. | Lens / marking field chosen from the real part and required detail. |
| Small parts or micro marks | Placement repeatability, glare and small-feature readability become critical. | Vision Positioning when location tolerance justifies it. |
Which laser route should be tested first for silver?
Laser selection should follow the mark target, surface condition, geometry and sample result. The material name alone is not enough to choose a source or power class.
| Laser route | Where it is usually evaluated | Important boundary |
|---|---|---|
| Q-switched fiber | General metal identification, text, logos and shallow engraving where the sample response is acceptable. | Polished silver can narrow the usable process window; do not assume a dark cosmetic result without testing. |
| MOPA fiber | Projects that benefit from a wider pulse-control window for contrast, heat accumulation, surface reaction or cosmetic tuning. | MOPA does not automatically guarantee a darker or better silver mark; the advantage must be demonstrated on the actual part. |
| UV laser | Selected fine-feature, micro-code or delicate-assembly work where precision and thermal sensitivity justify evaluation. | UV is not the default choice for every silver part. |
| Green laser | Selected precious-metal tasks where sample testing shows a useful process advantage. | Choose it because the sample result is better for the requirement, not because silver automatically requires green wavelength. |
| CO2 laser | Packaging, labels or some organic surface layers associated with silver products. | Generally not the normal route for direct marking of bare silver metal. |
What can go wrong when marking silver?
A good silver sample test should intentionally look for the most likely failure modes instead of approving a mark only because it looks acceptable immediately after marking.
Weak or unstable contrast
Polish, contamination, tarnish, pulse settings, cleaning and viewing angle can change the apparent contrast.
Heat-related deformation
Thin jewelry and delicate parts can distort if heat accumulation, focus or pass count is too aggressive.
Excessive material loss
Deeper engraving on precious-metal products can affect weight, edge quality and cycle time. Depth should follow the actual requirement.
Plating breakthrough
On silver-plated parts, excessive removal can expose the base metal and permanently change appearance or function.
Post-polish mark loss
A shallow surface-contrast mark can be weakened or removed by later polishing, refinishing or abrasive cleaning.
Tarnish / cleaning color shift
The appearance immediately after marking may not match the appearance after cleaning, storage, handling or later tarnish formation.
Readable photo, unreadable code
QR and Data Matrix marks must be checked with the intended reader or verification method; visual appearance alone is not enough.
Reflection and residue risk
Bright surfaces, coated parts and metal removal require appropriate beam-control, enclosure and extraction review for the final machine configuration.
- Plating thickness is unknown and exposing the base metal is not acceptable.
- The approved appearance changes after the real cleaning, polishing or finishing process.
- Thin parts deform, burr or lose unacceptable material at the required engraving depth.
- A QR or Data Matrix looks acceptable but fails the intended reader or verification method.
- The mark enters a functional electrical-contact area or another no-mark zone.
- A purity, fineness or identification requirement still has an unresolved destination-market legal or hallmarking requirement.
Cleaning, polishing and tarnish can change the final mark
Silver should not be approved only from the appearance immediately after laser marking. The actual finishing and handling process can change contrast, texture and visibility.
After cleaning
Remove process residue and compare the cleaned surface with the required production appearance. A mark that depends on removable residue is not a stable result.
After polishing
If the product will be polished after marking, use the real polishing sequence during validation. Shallow surface contrast may be reduced by material removal.
After tarnish exposure
Silver can change appearance during storage and use. Where long-term cosmetic consistency matters, evaluate whether tarnish changes the contrast relationship between the mark and the surrounding surface.
After handling or wear
Jewelry, decorative products and handled components should be checked under the cleaning, wear or contact conditions that matter to the buyer.
Approve the result on the actual silver grade, finish and post-treatment
A substitute metal coupon can give the wrong answer. The most useful silver test uses the same material type, surface condition, plating structure, geometry and finishing process as production.
Confirm the input
- Silver type / fineness or alloy if known.
- Solid silver or plated construction; plating thickness if available.
- Surface condition: polished, brushed, matte, tarnished, coated or cleaned.
- Part thickness, geometry, cosmetic faces and no-mark zones.
Confirm the target
- Purity / identification information, logo, serial number, QR, Data Matrix or decorative artwork.
- Required contrast, depth, line width, code size or texture.
- Whether polishing, cleaning, coating, wear or electrical-contact restrictions apply after marking.
Confirm the acceptance result
- Appearance and contrast after cleaning.
- Depth, burr, deformation and material loss for engraving.
- Base-metal exposure on plated parts.
- Scanner readability for codes.
- Post-polish / wear result when required.
| Record item | Why it matters |
|---|---|
| Material / fineness | Shows whether the result came from 925 sterling, 999 fine silver, another alloy or a plated part. |
| Surface condition | Defines whether the sample was polished, brushed, matte, tarnished, coated or cleaned. |
| Laser route | Identifies whether the result came from Q-switched fiber, MOPA fiber, UV, green or another verified route. |
| Target result | States whether the sample was developed for contrast, engraving, code readability or decoration. |
| Post-treatment condition | Shows whether the approved appearance was checked after cleaning, polishing or another finishing step. |
| Acceptance method | Records the visual, dimensional, code-reading or durability criterion used for approval. |
How the silver sample result becomes a final machine configuration
The final machine is more than a laser source. Once the approved silver sample establishes the required result, the production part and workflow determine the optical field, fixture, positioning functions, safety enclosure, extraction and data requirements.
1. Laser source & process window
Select fiber, MOPA, UV or green from the validated result. Required power should follow depth, mark size, cycle expectation and the tested process window rather than a universal silver wattage rule.
2. Lens & marking field
Choose the field from the actual marking area, part size and required feature detail. A larger field is not automatically the best choice for small, high-detail marks.
3. Fixture & workholding
Protect cosmetic faces, maintain focus and control repeatability. Thin or polished parts may need low-stress contact surfaces and defined orientation.
4. Rotary / vision / 3D
Evaluate rotary for rings and cylindrical parts, vision when location tolerance or random placement justifies it, and 3D when height variation exceeds a normal flat-field focus allowance.
5. Enclosure & extraction
Final safety depends on laser wavelength, access mode and complete machine configuration. Engraving, coatings, plating and polishing residues also affect extraction and filtration requirements.
6. Production workflow
Confirm batch size, loading method, changeover, cycle expectation, variable-data needs and code verification before finalizing the quotation.
Reflective silver marking needs beam-control and fume review
Polished silver can create reflection concerns, while plated, coated, oiled or polished parts can change the fume and residue profile. Safety decisions apply to the complete machine configuration, not to the laser source alone.
Reflection control
- Review shiny fixtures and polished workpieces for specular reflection paths.
- Use the final enclosure and workholding geometry when assessing operator exposure.
- Service or open-mode work requires controlled procedures appropriate to the actual laser system.
Machine protection
- Evaluate enclosure, door interlock, emergency stop, viewing window and workpiece access for the selected configuration.
- Protective eyewear, when required, must match the actual wavelength and risk assessment.
- Do not infer a final safety class from the laser source alone.
Fume & residue control
- Ask for coating or SDS information when silver is plated, lacquered, oiled, painted or chemically treated.
- Use local extraction and filtration appropriate to metal particles and coating residue.
- Define collection and housekeeping when removed precious-metal material has value.
Silver should not share one parameter assumption with other metals
Gold, stainless steel and copper can all require identification or decorative marking, but their surface chemistry, heat behavior and validation risks differ from silver.
Silver
Reflective, soft, tarnish-sensitive and value-sensitive; finish, plating and post-polish behavior are important.
Gold
Precious-metal marking with different alloy, surface and loss-control considerations.
Stainless Steel
Different passive-layer behavior, corrosion considerations and contrast mechanisms.
Copper
High reflectivity and thermal conduction with different oxide, coating and electrical-contact considerations.
Silver laser marking questions
Can silver be laser marked?
Yes. Many silver parts can be laser marked, engraved or coded. The result depends on silver type, surface finish, tarnish, plating, geometry, required mark and post-mark processing.
Which laser is usually tested first for silver?
Q-switched fiber and MOPA fiber are common starting routes for many metal-marking tasks, while UV or green may be evaluated for selected fine-feature, delicate or process-specific requirements. The actual sample result should decide the route.
Can a laser make a black mark on silver?
A dark mark may be possible on selected silver surfaces, but blackness should not be treated as a default or guaranteed result. Finish, tarnish, pulse control, cleaning and viewing conditions all affect appearance.
Can tarnish change the appearance of a silver laser mark?
Yes. Tarnish changes the surrounding silver surface and can change the visual contrast relationship over time. Where cosmetic stability matters, include cleaning and realistic storage or handling conditions in validation.
Will polishing weaken or remove a silver laser mark?
It can. Shallow surface-contrast marks are more vulnerable to later polishing or refinishing than deeper engraved features. If polishing is part of production, approve the sample after the real polishing process.
Can silver-plated parts be marked without exposing the base metal?
Sometimes, but it depends on plating thickness, base material, required mark depth and the process window. A plated part should be tested specifically for substrate exposure rather than treated as solid silver.
Will marking deform thin silver jewelry?
It can if heat accumulation, focus, pass count or workholding are unsuitable. Thin rings, pendants and delicate components should be tested with the final geometry and surface finish.
Send the real silver part and target mark
Share the silver type or fineness, solid or plated construction, final surface finish, part dimensions, mark artwork, target contrast or depth, code size, post-cleaning or polishing process, production quantity and any functional no-mark areas. Zhuorui Laser can review the application, test the appropriate laser route and convert the approved sample into a machine configuration and quotation.